So you wanna know how to install Serum presets? In this article we’re going to cover everything you need to know when installing new Serum presets, wavetables, & even skins! Installing Serum Presets TL:DR; Here’s how to install Serum presets: 1. Download The Preset or the preset Pack Firstly you’ll want to … Read more
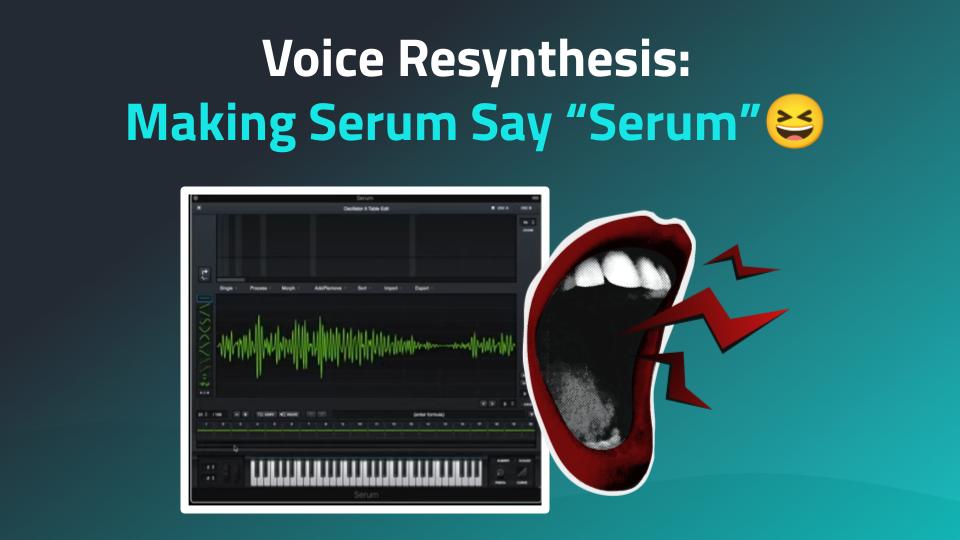
Serum isn’t just a wavetable synth—it’s a vocal synth too. Well, kinda. You can feed it a recording of your voice and turn it into a playable synth. So let’s make Serum say “Serum”.
Note: This is not about creating a simple sampler; rather, Serum analyzes the audio to capture the essence of the vocal in a process that breaks it up into subtables. This method allows vocal resynthesis from audio inputs. This isn’t an AI singing generator either (duh!). It won’t make your voice sing lyrics or hold a melody like the popular AI tools out there. Instead, you’re shaping your voice into a playable synth sound—more robotic than human.
Become A Synthesizer Pro
Master how to program a synthesizer with Syntorial and remake any sound by ear. Download the demo and try the first 20 lessons, on the house.
First, record yourself saying “Serum” and import the file into Serum’s wavetable editor. Serum will break it up into 256 tiny waveforms (subtables). The result? A rough, choppy version of your voice that kinda sounds like a robot learning English. Not great yet, but we’ll fix that. Note that I’m intentionally over pronouncing.
Selecting the Optimal Number of Subtables
You can compare different Fast Fourier Transform (FFT) import sizes (256, 512, etc.) during import. This will affect how smoothly the word “Serum” appears as you modulate through the wavetable. In our case, 256 gave the cleanest result. Try different settings to see what works best for your recording.
Cleaning Up The Voice Wavetable
Now, trim the silence at the start and any extra noise at the end. Then, delete 3/4 of the subtables. This will make the playback jumpy at first, but don’t worry—we’re about to smooth it out.
Making The Vocal Resynthesis Playable
Here’s the magic: turn on Spectral Morphing. This blends the subtables together, transforming the choppy mess into a smooth, playable vocal synth.
Conclusion
With a little editing, Serum can take a simple word and turn it into a custom voice synth. Try it with different words, tweak the settings, and make your synth talk. Or scream. Or whisper creepy things in your track. Your call.
And here is a more in-depth video (10 minutes long) from our Serum Lesson Pack:
In the realm of electronic music, the epic EMD Dance lead is an iconic sound that stands out for its richness and fullness. The key to this sound is the supersaw, which might seem complex, but with a straightforward approach, anyone can achieve this powerful sound. Here’s a simplified guide using Reveal Sound’s Spire.
Unison: The Foundation
The essence of the sound’s big washiness lies in its unison. More voices equate to a richer, more enveloping sound. By maxing Spire’s Unison Density, our sound officially becomes a supersaw that fills the audio spectrum with its aggressive, bright presence.
Adding Oscillators
The next step involves bringing in two additional oscillators, set to the same settings as the original. The magic happens when these are slightly detuned from each other. This detuning is crucial as it introduces a lush, phasey quality to the sound, and makes are sound even more lush and aggressive.
Filtering and Bite
To sculpt the sound further, a basic high pass filter is applied. This helps in cutting out the low frequencies, ensuring the overall sound doesn’t muddy the mix. Then, to add bite and definition, the sustain level is reduced. This adjustment allows the attack of the sound to be more pronounced, making it stand out in a mix.
Ready to create your own patches?
Learn how with the award-winning synth training app SYNTORIAL.
Syntorial combine’s step-by-step video lessons with interactive challenges on a built-in soft synth where you’ll create hundreds of patches as you learn.
Often, the process of shaping the sound can lead to a loss in overall volume. To compensate, the volume is increased. Following this, a bit of distortion is introduced, clipping the sound slightly. This is not just about making it louder but adding character and warmth to it through subtle drive and distortion.
Compression and Reverb
To ensure the sound is really punchy, compression is applied. Compression is usually used to control dynamics, but in this scenario it’s more about squeezing the tone. After compression, reverb is added to give the sound space and depth. However, it’s essential to dampen the reverb to prevent it from overwhelming the mix, ensuring the sound remains clear and focused.
Conclusion
Creating an epic supersaw-style EDM dance lead is about more than just stacking sounds; it’s about carefully shaping and controlling those sounds to achieve a desired emotional impact. Through the use of additional oscillators, strategic filtering, volume adjustment, distortion, compression, and reverb, a simple waveform can be transformed into a powerful musical expression. This step-by-step approach demystifies the process, making it accessible for producers at all levels to add the iconic supersaw to their sonic toolbox.
The unmistakable sound of the Parliament Funkadelic Flashlight bass is a milestone in funk music, largely due to Bernie Worrell’s ingenious use of the Moog synthesizer. This blog post delves into how to replicate that fat analog sound characteristic of “Flashlight,” regardless of whether you have a Moog or not.
The Essence of “Flashlight” on the Moog
Bernie Worrell’s mastery in crafting the “Flashlight” sound on the Moog synthesizer serves as our foundation. Here’s how to start:
Initial Setup with the Moog
Waveform Selection: Begin with a plain saw waveform.
Oscillator Configuration: Modify the first oscillator by dropping it down an octave and switching its waveform from saw to square. The Moog’s square wave isn’t perfectly square, contributing to a unique pulse sound that’s slightly brighter.
Adding Depth with a Second Oscillator: Introduce a second oscillator, tuned an octave higher than the first and slightly detuned to create subtle movement and depth in the sound.
Filter Adjustments: Utilize the low-pass filter to cut off higher frequencies and adjust the resonance to sharpen the sound. Enhance the analog warmth by driving the filter through Moog’s distinctive feedback system.
Vibrato for Expression: Incorporate vibrato via the mod wheel, using either the original complex method with the third oscillator or a simpler modern LFO system for dynamic playability.
Emulating “Flashlight” on Modern Synths
If you’re working without a Moog, you can still get close to the Parliament Funkadelic Flashlight bass sound by focusing on certain features in your synth.
Using Serum for Analog Emulation
Analog-Style Waveforms: Select analog-emulating waveforms, such as Serum’s MG wavetable, to mimic the imperfect shapes of analog synth waveforms.
Filter Emulation: Employ a Moog-style filter (also known as Ladder filter), indicated by Serum’s MG label, and use the drive function to simulate the Moog’s external feedback system, crucial for that rich, warm sound.
Remake This Sound Yourself
Learn how to program this synth preset with Syntorial, all by ear. Download the demo and try up to three challenge packs.
For synths lacking specific analog-style features:
Basic Waveform Adjustments: Opt for a square wave but tweak the pulse width to make it slightly narrower to achieve a sound similar to Moog’s square wave. Ensure your low-pass filter has a steep cutoff (24 dB).
Creating Drive Without the Drive Knob: If your synth doesn’t have a drive function, lower the volume of the higher oscillator for a softer sound and boost the low end with an EQ around 200Hz to mimic the warmth of Moog’s filter drive.
Conclusion: Bridging the Gap to “Flashlight”
Recreating the “Flashlight” sound is about understanding the synthesis techniques Bernie Worrell used and adapting those principles to your equipment. Whether you’re using a Moog, a synth like Serum, or a more basic model, focusing on waveform selection, oscillator configuration and filter manipulation will get you close to that legendary P-Funk sound. This exploration into synthesizer settings not only pays homage to “Flashlight” but also encourages creativity and experimentation in music production. The unmistakable sound of the Parliament Funkadelic Flashlight bass is a truly fantastic sound worth recreating.
In this blog, we’ll explore the steps to recreate the iconic synthesizer sound from Paul McCartney’s holiday classic, “Wonderful Christmastime.” This guide is perfect for musicians and synth enthusiasts who want to capture the essence of this festive tune.
Starting with the Saw Waveform
The journey begins with a simple saw waveform, a universal starting point for any patch.
Increasing Polyphony
Next, we switch the synthesizer to Poly mode. This allows us to play Paul’s chords, adding depth and complexity to the sound.
Changing the Waveform to Medium Pulse
To mimic the distinctive timbre of the song, we change the waveform to a pulse wave with medium pulse width. This is kind of similar to a saw waveform, but with a slightly more hollow and artificial sound, in a good way!
Adjusting the Amp Release
Make the Amp Envelope’s release a little longer. This tweak allows the notes to fade out more naturally, instead of abruptly cutting off. This gives the sound playable feel, much like you get from a traditional keyboard instrument like a piano.
Creating the “Meow” Sound
The signature “meow” shape is achieved using the filter envelope. This involves setting the cutoff to the desired endpoint, adjusting the envelope amount for the starting point, lowering the sustain so that the decay moves the cutoff down, and then shortening the decay and release parameters. The goal is to have a quick, sweeping effect. To make the sound “juicy,” we increase the resonance. This “squeezes” the filter and creates that “meow” shape.
Implementing Key Tracking
Key tracking is used to make the lower notes darker and the higher notes brighter. While you could use this sound without it, key tracking gets us closer to an exact match.
Incorporating Pulse Width Modulation
Pulse width modulation (PWM) is added to introduce movement into the sound, giving it a subtle “smear” effect. This is a subtle step that removes stiffness and adds a little life.
Softening the Attack
Slightly increasing the amplifier’s attack time softens the onset of each note, reducing the percussive element and creating an almost “compressed-like” sound.
Adding Delay
The finishing touch is the addition of delay. This effect is prominent in the original track, echoing each chord we play. Set the rate to 1/8 so that we hear an echo between each chord during the chorus.
Conclusion
By following these steps, you can recreate the unique synth sound from Paul McCartney’s “Wonderful Christmastime.” Each step in this process contributes to capturing the essence of this festive classic, allowing you to add a touch of holiday spirit to your own music creations. Whether you’re a fan of the song or a synth enthusiast, these techniques offer a fun way to engage with one of the most recognizable holiday tunes.
There are soooooooo many synths nowadays. It’s overwhelming, really. So I’m gonna help you boil it all down by telling you what does and doesn’t matter when choosing a synth. DOESN’T MATTER 1. Price If a synth is giving you the sounds you want, it doesn’t matter how much you … Read more
The synth we’re going to re-create today is a very special one that inspired a whole genre of dance music – acid house! The Roland TB-303 Bassline synth. It’s an extremely limited synth, with only a few knobs to twist and turn, yet it’s amazing for creating rich, large synth … Read more
We take a look at the synth instruments that were used to soundtrack the cult phenomenon and give you help and guidance on how to achieve similar sounds using analog emulation VST Synths. Before we go on, lets set the expectation on the article below. In no way is this … Read more
Even if you are new to the world of digital audio workstations (DAW) you’ll have probably already come across VST vs VSTi’s. As a music producer, it’s important to understand and know the difference between the two. When you first open your DAW you’ll have a range of stock instruments … Read more
So you’ve just got your shiny, new, free copy of Vital and you want to install some presets. In this article, we’re going to show you exactly how to install, and manage your preset banks in Vital, on both Windows and Mac. Here’s how you can install Vital preset packs … Read more
So you’ve been on the Synthwave wave, and want to make a beautiful sounding 80s style bass. In this Synthwave Bass tutorial we’re going to show you exactly how you can program one on any synth. To illustrate the core sound design principles we’re using a free synth VST plugin … Read more
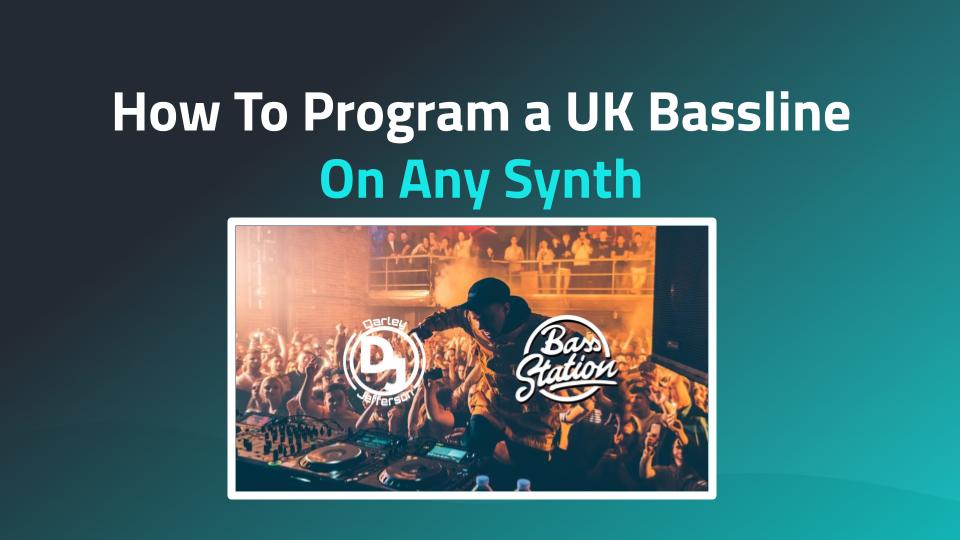
Recently I had a lesson with one of my 1:1 students, & he asked me to dissect how UK bass sounds are made. I was delighted to open up Serum and put the pieces of the puzzle together, and I want to share how it was made. So… In this … Read more
In this new series, I’ll show you how I recreate patches that have been requested in the Syntorial Forum.
We’re kicking off with “So Familia” by Kahn, Commodo and Gantz, which is a fairly simple, rhodes-esque patch.
RECIPE:
Oscillator: Saw
Filter: Low Pass 24 dB, with a little Drive, and Key Tracking enabled. Bring the Cutoff down until you get the desired roundness.
Amp Envelope: Create a piano shape by bringing the Sustain down and setting the Decay and Release to medium long, around 1.2 seconds.
Velocity: Route it to volume, and play the higher repeating note louder than the lower notes. Also, if your synth allows, route the velocity to the Amp Envelope attack as well. Set the Attack to around 120 ms, and then set the Velocity modulation amount to a negative value that brings the Attack down to zero. Now, the harder notes (higher velocity) will have a sharper attack transient, and softer notes will have a softer attack transient.
NOTE: if you can’t route velocity to amp attack, instead create a second copy of the patch for the lower notes, and set their amp attack to around 120 ms.
If you want to request a patch, create a topic on our Forum!
VIDEO TRANSCRIPT:
Today’s patch remake is from “So Familia” by Khan, Commodo and Gantz it’s this kind of Rhodes-y, sort of electric piano-style patch. Here it is: And here is the remake: It’s a pretty simple patch, though there is something interesting going on with the velocity.
Let’s get the basic sound set up first let’s bring up another copy of Serum this one is from scratch Let’s bring in our filter. Now, we want the higher note to be brighter than the lower notes, and if you look at the notes you see there’s this B. It just repeats over and over again while these notes play underneath. We want that to be brighter than the others so… turn on our key tracking for the filter adjust the cut off Yeah! And now our B is a little bit brighter than those lower notes.
Next let’s get our envelope, our amp envelope shape in order so it’s kind of like a piano-style you know, fading tone but it’s got a bit of a longer fade than your average piano. So, let’s bring our sustain down and then increase our decay a little bit. Match with the release There we go. it looks shorter. And jumping back to the filter for a second, I want to increase the drive let’s bring a little warmth into this patch There we go.
Nice! Now that’s basically the tone here. Really simple patch and i love these simple patches that have a nice vibe without having to do much. However, there’s variation in it, variation of the volume and variation in the attack, so we’re going to bring in velocity for that. That’s really going to bring in this nice subtle texture that makes it less rigid-
So first off, let’s route our velocity to our volume that’s very typical and now, you’ll see if we go back to the notes over here you’ll see that all these high repeating Bs repeating b’s have a higher velocity they’re being played harder than the lower notes, which have a lower velocity. So we want this higher note to be brighter now with velocity routed to our volume, that B is really sticking out now. but along with that just louder volume, I feel like those higher notes, those higher Bs have a bit of a stronger attack, a more pointed attack transient.
So, what we can do here in Serum is, we can allow–we can route the velocity to our amp attack. So here’s how i want the lower notes to sound. I’m going to increase the amp attack. I want them to sound kind of like this All right? this little… yeah but only the lower notes I don’t want the upper notes to sound that way. So, because I’m playing the upper notes harder, I’m going to route velocity to the attack, I’m going to create negative modulation.
Okay, so what this means now, is the harder i hit the–the harder I hit the key Right? as the velocity increases my modulation amount will bring the attack down. That’s what the negative modulation amount is doing. So the harder I hit a key, the lower the attack will be. The softer I hit a key, the higher the attack will be. So those high Bs have a point on them but the lower notes kind of ease in. All right? it’s really nice So now the patch is way less rigid. You know let’s compare, actually… I’m going to bypass all the destinations. Here’s what it sounded like before Now let’s bring it back in All right? Ah! velocity really gave it some life.
Now if you have a patch request you’d like to see me remake, head over to our forum, post a topic there with the link to the youtube video also if you’re good at remaking patches like this, I could always use your help look through the forum and help other people out answer their questions and make suggestions
Proceed with caution, lest your face be melted off.
Recipe
Oscillators:
4 oscillators total – Osc 1-3: Saw wave, 9 voice unison, with the unison detune amount turned up to where it juuuuust starts to sound a little out of tune. This detune amount will give you the aggression you’re looking for. Also max out the Unison width so we get a big wide sound. Then detune Osc 2’s overall Fine pitch down a bit, and Osc 3’s up a bit. Now you effectively have a giant 27-voice unison. FACE. MELTED. – Osc 4: White noise. Pitch it up 4 octaves and high pass it. We just want really high, hissy white noise. Also apply the same unison settings as Osc 1-3 to get a big wide sound. And dial up the volume so that it’s very audible, but blends into the other saw oscillators
Filter
High Pass, 12 dB slope. Turn up the cutoff just enough to take some of the frump off the bottom.
Amp Envelope
Bring the Sustain down pretty far, and make the Decay fast. Then bring the overall volume up to compensate for the volume lost with the low Sustain. Now we have strong attack transient.
Distortion
Dial in just a little bit of aggressive clip-style distortion. It’ll fight with the pulsating unison voices, and make it a bit angry. Don’t go over board here. Just a tad.
Reverb
Big size, pretty wet. Dampen it to remove some highs, so that only the body echos throughout the caverns.
Compression
Spire’s X-Comp knob is brilliantly simple. I just turned it up halfway and it squeezes the sound, making it even more aggressive. But any compressor will do. Just bring down the threshold until it starts to tighten up.
Can’t wait to try these out? Come over to the Patch Share forum and show us what you came up with!
VIDEO TRANSCRIPT
In this tutorial we’re gonna make a giant supersaw trance lead. And the key to this sound is basically just a saw wave with tons of unison. However, if you really wanna make a big, hard-hitting one, there’s a lot of subtle changes you need to make to really get that big sound.
I’m using Spire, and as you’ll see, there’s a couple reasons why it really lends itself well to this sound. But really, any synth that gives you big unison, lots of unison voices, you’ll be able to achieve it with that synth. So, let’s get started. Here we just have, good old, plain saw wave. And we’re gonna switch over to mono. One voice at a time. And, we’re gonna get right into it, unison.
So Spire gives us up to nine voices, and the more voices, the better. So, I’m gonna do all nine, as many as I can. And we’re gonna go full width. Nice wide, big sound. De-tune is key here. As you turn it up, yeah you get a more de-tuned sound, but that lends itself to kind of an aggressive tone. Listen to how it just becomes a little angry. So you can kinda dial in how much anger, how much aggression you want in the tone of your lead.
I’m gonna go right about there. Now, Spire has something unique which really helps with this and that’s this density knob, which, kind of messes around with how the different voices, in this case, all nine, how they’re spread out exactly. Right now we’re getting a very clean, uniform spread of our nine voices.
This is actually meant to emulate something called a hypersaw, which you see on the Access Virus, a famous synth. But if I crank the density, it’s gonna become a supersaw, which emulates something we saw in an old Roland, JP-8000 synth, it was a classic sound and it’s still used today because it’s this big, supersaw. Hear how aggressive and kind of messy it is? It’s that imperfect analog, versus clean hyper digital. Either one works, this is really taste, but we’re going for big, aggressive, trance, supersaw lead, so I’m gonna supersaw, full density.
Other synths will sometimes give you control over the spread, like Serum lets you really get in and dial how these things are spread out in a more complex manner. But in any case, you’re fine with either one. I just like this supersaw, ’cause of how big an aggressive it is. Now, I wanna go even bigger. But I’m maxed out at nine. So I’m gonna bring in two more oscillators with the same settings and de-tune them.
So, here’s oscillator one. I can copy, go to oscillator two, and paste. Go to oscillator three and paste again. So now, all three, one, two, and three, are both these big nine voice unison saws. I’m then gonna take oscillator two, turn it up to the same volume as one. And I’m gonna de-tune it up a little bit. Let’s just see how much. Bring in oscillator three and de-tune it down a little bit. Alright, so now we effectively have like a 27 voice, supersaw, this is a massive sound.
Now, on the top of our sound, we have that kind of washy sizzle, the shh. That’s just what happens when you put together a ton of de-tuned saws. I wanna emphasize that even more by layering some white noise. Oscillator four. And I’m gonna turn on the other oscillators for a second so you can hear this. So right now it’s a saw, switch to noise. Now, the key here is you’re gonna have to filter it separately from the other saws. And Spire gives us this built right into the oscillator itself.
If you’re using another synth, and you have like a second filter, ’cause we’re gonna need to use our main filter for something else, you can use that separate filter to shape the noise in a way I’m about to show you or you could just use a whole other copy of the synth, a whole other layer. But right now it’s low-passed. So we’re just getting this low, kinda gross round noise. We want this bright, sizzle-y top, so.
Switch to a high pass. Now we’ve got rid of the bottom and we just have the top. And this also has a big resonant peak in it, I wanna get rid of that. And it needs some width. Very nice, now. That’s kind of a rare feature as well, I see that in Spire, I don’t see noise width in a lot of synths, so, again, another key feature here. I’m gonna bring back in my other oscillators.
Now, this noise is still a little too bottom heavy. Even though it’s high-passed, I want it brighter, I want it higher. So I’m gonna pitch it up. There we go. Alright, so now we have this big, de-tuned washy sound. And this has gotta be bright and cutting, and some of these lower notes, there’s a lot of low end and body. I actually wanna remove that, so I’m just gonna grab, basic high-pass. And by default, Spire has a filter envelope, so I’m gonna get rid of that. And then I’m just gonna take off.
We don’t wanna get rid of too much of the body, we this to be a full sound, but I just wanna get rid of that big bottom. Okay, so we’ve established our sound. Now I wanna give it more bite, more impact, really drive it home. But before I do, just a quick word about our synth training app, Syntorial.
This isn’t your ordinary synth tutorial. This is Syntorial. Making programming synths easy with video game-like training, teaching you how to program synth patches by ear. Each lesson starts with a demonstration. Then an interactive challenge. With over 200 lessons. Once you complete the program, you’ll be able to create the sounds you hear using almost any synthesizer. Try the award winning Syntorial today.
Alright, so the first thing I wanna do is, create an attack transient, want this thing to really hit on every single note. We’re gonna use our amp envelope for that. So right now, we just have max sustain, there’s nothing really happening, it’s just on, off. So I’m gonna bring our sustain down. To about here. And, so you can hear what’s happening I’m gonna give it a long decay for a second. So you can hear, over this decay, it’s just getting quieter.
But I wanna make it faster so it creates more of a TKK on the front of the sound. So I’m gonna go right about here. And because our sustain is so low, we’ve lost a lot of our overall volume. So, bring it up. Alright, now we’ve got that spike at the front of the sound. Now I wanna make it a little angrier. I’m gonna use distortion. Lot of different distortion types here, I’m gonna go with clip. Crank our drive, and then I just wanna dial in a little bit, right? So there’s no distortion being applied, it’s fully dry right now.
It makes the noise a little bit more noticeable and it makes the saws a little angrier, a little more combative. And you can use other types of distortion. Not a huge difference in this case, but I like the clip, it’s got a bit more of a bite to it.
Next I wanna squeeze it with compression. Spire’s got this wonderful x-comp knob. It’s just a simple one-knob compressor. All this movement going on with the unison, all these voices, trying to compress that creates this really combative sound where everything is just kinda fighting and it just gets uncomfortably angry. Very nice.
You could do this with a regular compressor too, you’ll have to tweak the settings more, but the idea is that you’re forcing this moving sound to be compressed down, you’re squeezing it. Finally, this needs to be big and epic, we’re gonna use reverb for that. Gonna dial in a fair amount of wetness. I want it to be in a huge space, which a longer decay will give us. Oh yeah, we’re in a canyon, in a cavern.
Now, that’s nice, but that big, long, bright reverb kinda butts heads with the main sound. It just creates a lot of sound, it’s kinda messy. So I’m gonna dampen the reverb. It’s kinda like putting a low-pass on just the reverb. So we still get that big sound but there’s no more brightness in it so it’s not really filling up too much sound, it’s not really fighting the regular patch. And there you have it, big, supersaw trance lead.
Now, if there’s some patches you would like help with, any kinda patch, head on over to our forum at syntorial.com, and post a request there. And I or someone else will help you with it. There’s a link down in the description for that. And of course, we have a lot of videos like this on YouTube, so please subscribe.
I was graced by the gods (by whom I mean Native Instruments) with an early release of Massive X and I was able to play around with it to create this comprehensive video review. Enjoy.
VIDEO TRANSCRIPT
Massive X, this is a big overhaul of Massive. It’s a totally new synth from the ground up, but it still has some elements from Massive so, it feels like Massive and a brand new synth at the same time. It’s really nice.
So, this is Synth Spotlight, I’ll be focused on the usual thing which is what makes this synth interesting. Why it stands out from other synths, why you should care. But I’ll also touch upon, you know how things have changed from Massive, what they brought along and how they’ve changed it. S
o, the centerpiece of this thing is the Routing panel. If you remember, old Massive, original Massive, it had a Routing panel as well. And this allowed you to do a few things like these instant effects down here, you could determine where they were in the signal path. So, if I click there, it’s position between Oscillator and Filter. Or I could put it after the filter, a few things like that. It was limited, but it was pretty cool.
However, Massive X has taken that idea and ran with it creating pretty much a total modular architecture. Right here, we’ve got how everything is connected. So, right now we’ve got Oscillator one and two, Noise one and Noise two down here. And then it goes through a chain, we’ve got A, B and C insert effects, that’s A, B, and C. We have the filter F, that’s represented down here. And so you can see the chain.
The oscillator is going into insert effect A, which then goes into the filter, which then goes into insert B, insert C, and then out into our effects and eventually out the end. So, just there was basic example. Let’s say, I set up insert effect B, as a you know, maybe distortion. Or let’s do a Bitcrusher actually. So don’t- right now because the filter is before it. As I change this frequency, the cutoff of our low pass filter doesn’t make it rounder, it just changes the sound going in our Bitcrusher, which then kind of brightens it again in various ways.
So, maybe I’m thinking, well, you know, I want the Bitcrusher before that. I wanna filter the Bitcrusher sound. Easy. All we have to do is disconnect our filter, and our Bitcrusher, and reconnect things in a different order. Then now, we get our crush sound, that is then is then filtered. So, that’s just a basic example of how to use this. It’s the tip of the iceberg. There’s a million things you can do with this Routing panel.
I’m gonna go through all the different modules up here. And you’ll find that I keep coming back to the Routing panel. It’s such an integrative part of it. And it creates so much flexibility in this synth.
Alright, so let’s jump in and start with our Oscillators up here. So, two Wavetable Oscillators, a lot of Wavetables here. Way more than the original Massive. And they actually brought some of the original Massive ones along under remastered, which is a nice touch. Each of these Oscillators also has a bunch of modes, I call them like, “Morph modes.”
If you remember, the original Massive had that as well. We had the spectrum bends and format, allowed you to kinda morph the waveforms in various ways. Well, now that we’ve got even more of those, and each of them has their own sort of subset as well. One new one they created was called Gorilla, which I really like. Which let me initialize our sound. Before I show you that. Okay. Go to Gorilla. Now listen to this. It’s like a really aggressive sync. But this itself has a few different versions. So this is King, changed to Kang. So, not only do we have all these wavetables to work with, we’ve had a lot of ways we can mess with them, and morph them.
Now, if you aren’t familiar with the original Massive, you may be asking, well they got rid of an oscillator… And that’s true, we got two wavetable oscillators instead of three. However, instead of having three of these, they threw in an additional three subtractive oscillators. If you go over to the, Insert effects, you’ll see oscillator. This is a subtractive oscillator.
So, what I’m going to do is, break this, break off all these. Send B and bring this over here and connect it to the beginning of our chain, and now, I have a additional oscillator to work with. One, you know, common use that comes to mind is a sub oscillator. And you got a few different options here. Standard, Subtractive waveforms.
Another use for this. Let’s say you wanna add in, a sine wave, layer that in to create some fatness in your sound. And thanks to our Routing panel, you know, let’s say we have a bunch of effects going on. Our sound’s really going crazy. But we want a pure sine wave, you know to layer in, give it some body, we don’t want it affected by everything. No problem, so move it directly to the output. And now, we can do whatever we want to our main sound, our sine wave will be untouched. Or maybe we wanted to go through just one of the effects. Okay, fine, we can do that. So again, you see how great this Routing panel is. It really lets you wire up this synth any way you want.
Alright, one more thing about these oscillators is along with our two wavetable oscillators and our three insert oscillators. We have two dedicated phase modulation oscillators. So, phase modulation PM creates a sound that’s pretty much identical to frequency modulation. FM synths, soft synths, usually are using PM instead of actual FM. But you get an FM sound. So these are basically, two oscillators dedicated to giving us FM sound.
All you gotta do is enable PM one, set this to a sine wave. And now this knob will increase the amount of phase modulation that supplied to Oscillator one. And what I really like, a nice touch here is this pitch control is done in ratio. So one means it’s the same pitch as Oscillator one, two means it’s octave higher. We could go half, octave lower. This is how FM synths do it. So if you’re familiar with FM synth programming, you really like this. If you don’t like that, no problem, turn on key track and it’s good old semitones.
Now, we’ve got two of these, and we can route them in various ways. I could have them both modulating Oscillator one, or, you know, one to one, two to two. And on top of that, we had this auxiliary phase modulation source, where we can wire up anything we want to this and it becomes our phase modulation source. One example would be, over here in our Inserts. We have A Phase Modulation Oscillator. That’s the guy right here. To use it, all we gotta do is wire it to this box, PM auxiliary. Whatever is connected into here, then becomes our auxiliary phase modulation source. So, enable auxiliary. you turn this one down.
So, in reality, we have five different Phase Modulation Oscillators and we can wire them to one and two in various ways. So it gives us kind of a mini FM synth inside of this big wave table synth. Very nice touch. And because of the Routing panel, we can do some strange things here, like, I could change C to Bitcrusher, and I do have to connect the input to get it to work. But, let’s turn this off. So it’s kind of bizarre. But this just as an example, we can use anything as our phase modulation source. Or, another example, we could do FM feedback where the oscillator that’s being modulated is also the modulation source.
It’s actually a great way to get kind of like a saw-like sound. So, tons of options with the oscillators. And lastly, there is a unison section, set the number of voices, the width, the spread, you can create chords, all sorts of options here.
Alright, before I move on to these next sections, I just wanna briefly mention that this video is brought to you by, us Audible Genius, the creators of Syntorial. Syntorial is videogame-like training software, that’ll teach you how to program synth patches by ear. Whole goal of this training App is to get you to the point where you can take the sounds you hear. Whether they’re in your head, or music you’re listening to and be able to create them on a synth.
Briefly, here’s how it works. I’m gonna grab a random lesson. Starts with a video. So, in this video, I demonstrate something. Maybe I talk about filters, maybe I talk about waveforms. And I go through, demonstrate them, explain them. You then go to a challenge. In this challenge, you’re given a hidden patch. I can hear it, but I can’t see it, I have to go over to my patch, which is a plain saw, and I have to recreate it all by ear. So it’s all about ear training.
That’s what synthesis is all about. You have to train your ear. Otherwise, you’re just guessing. You got to be able to take the sounds you hear and make them. Now, I’m not gonna make any changes here. I’m gonna submit this to see how I did. Obviously I did terrible because I didn’t make any changes. But here’s what happens, any controls that are correct, are green, and the ones that are wrong are red, and I can make the changes and hear the difference.
You start showing your ear the difference. Now, it starts incredibly simple. The first lesson is about, Saw and Pulse Waveforms. Saw and Pulse, I just talk about those two waveforms, I demonstrate them. And the challenge, all it is the waveform, you’re recreating patches with just one control. It gradually adds one control at a time until you get to the very end. In which you’re doing the whole synth.
Starts out simple, gets complex, trains your ear. Try it out, free demo, first 22 lessons link in the description. Okay, shut up, Joe. Back to Massive X.
All right, moving on, noise. Pretty simple here, but there’s two of them. And you might be wondering, why would you need two noises. Well, like the original Massive, this is more than just your typical white or pink noise. Let’s turn down this. Turn you on. You’ve got all sorts of stuff. So it’s more like a sampler in a way. Adds a whole new texture. I personally like the grizzly. So, if you’ve been thinking, “Man, I need a synth That creates some grizzly bear sounds”, look no further.
Right, so you got two of those nice. Filter. All right, we got a lot of filter options. And each one of them has a subset. So like this monarch, which I think is kind of like a Moogy analog filter, it’s got you know, a few different pulse settings or slope settings for the low pass, bandpass, peak, and each one of these has its own sort of sub settings.
So there’s this one called Creek which is really more like a distortion, few different types of sub distortions, and which I’m really happy about as they added this Gain knob , so we can Push the filter, get some warmth out of it. I find that’s very important in synths nowadays to get that nice, warm, analog-y sound. And you also might be thinking, well look, the old Massive had two filters, And you can route them various ways. This only has one. So isn’t that a downgrade? No.
First off, they substituted that with two sort of pre-made dual filters in typical ways. So like this is a parallel, you can choose two filters to combine in parallel. So low pass, high pass. Your sounds will run into a low pass, also a high pass, and that’s combined at the end. And so there’s just some common combinations for that. Or you can do serial, which is just a high pass, running into a low pass.
These are real common ways to use dual filters. So rather than have that complexity of having to manage those two filters, they did this instead. I like it, it just makes it more user friendly, while still giving you a lot of capability. I never really use dual filters that much anyway, personally. Okay, now along with this gain knob, we also have feedback, which again was in the old Massive, so if I. This takes the output of the filter, sticks it back into the input, so you create this rill, saturated sound. However, thanks to our Routing panel, we can apply a feedback loop to anything.
Example. I’m gonna take B, and put Anima. It’s kinda like a flanger. Alright, I want this thing to feedback, how can I do that? Well, our feedback route is determined down here. This is the beginning of our feedback loop, this is the end. So, our filter’s currently connected to it. The end goes into the feedback loop, and then that feedback loop comes back into the beginning of the filter. That’s why we get the sound we get when we increase our feedback.
You can do that to anything. I’m gonna create a feedback loop around Anima. Oops. A lot of experimentation here. What can I do with a feedback loop? What I like even better though. This reconnecting this. So, the output of Anima goes back into the filter and get this two module feedback loop.
Another thing I love about this Routing panel, feedback whatever you want to feed back. All right, so let’s go on to our Effects section. We got three of them X, Y and Z. A nice robust set of Effects, Reverbs, Delays, kind of standard stuff. Each of these has its own subset, though. So by going to reverb, tons of reverb types, you got a lot to work with here, very nice. One I wanna talk about in particular is this Nonlinear Lab.
On the surface, it just seems like a kind of a standard distortion, few different types. But what I love about this, is down here, this is an amp simulator. Toss it through a big reverb. Epic guitar sound. Love that effect. And, we can route these in various ways. So you can connect various modules into either X, Y or Z. And go here, here here. And we can route the actual effects in different ways. X, this is a pure serial Routing, X into Y into Z. We could do X and Y parallel. So, modules go into them separately, it’s summed, and then everything’s run through Z, or they’re all parallel, separate, and then summed at the end.
So more flexibility there with how our effects are routed. Alright, so that’s all of our modules up here. Let’s talk about our Modulation sources. We’ve got an envelope, right? Good old standard modulation envelope ADSR, with an extra hold period and a delay period, the beginning. A lot of options here, nothing super special. What I like is this exciter envelope. We turn off our effects here. Exciter envelope is basically an attack transient designer. It’s just for creating attack transients. Makes sense because that’s what we use envelopes a lot for. So this is just dedicated to that.
So I’m gonna route this to our pitch and change a couple settings here, I’ll explain what these are doing in a second. A ratio is basically the length of it. This is a really fast decay, creating a little attack transient with our pitch. But we can do various things with this. Like if I put center in the middle, we get both an attack and a decay. That is by the way, that’s as slow as it’s gonna go. This is just for short envelope transients. They go all the way this way. I squashed the attack, it’s all decay. Or this way, it’s all attack sloping up, and I can even hold it at the top. So it’s purely a little attack transient designer. It’s a nice touch since that’s we use envelopes for a lot.
Okay, next let’s talk about some LFO’s. Switch your LFO, let’s route it to cutoff. And by the way how we route things is the same just like the original Massive, just drag and then set the amount like this. So we have some standard waveforms here, square, sine triangle. But then we have all these interesting ones.
And I have to admit I really like this knob, there’s something really satisfying about it. And I mean a bunch of other standard controls here. What I like though, this nice touch is over here, I’m gonna increase our amp envelope, release, loop GTE. This is only gonna apply when my note is held down. When I let go it’ll go straight. Or the opposite loop release. When I’m holding the key, it’s a long note, when I let go, the LFO kicks in.
Interesting, one shot treats this like a envelope just goes through once. One shot release, only when we release the key. So it’s kind of interesting. I don’t know how I’d use that. But it’s different enough that I want to use it. Random LFO. So, this is like a sample and hold that you can tweak and control. By default, all it is a triangle wave. If I increase the Amp jitter, it’s gonna randomize the LFO amount. Frequency jitter will randomize the rate. So you can dial these in exactly how you want them.
Instead of a triangle wave, we can do a square wave and that’ll jump between values instead of smoothly bending between them. That’s like a standard sample and hold. So tweakable random LFO. Last, is our performer. Well, there’s a couple others, they’re kind of boring. This is a key tracking like no pitch velocity, really in depth though. So if you use key tracking a lot or use velocity a lot, and you’re obsessed with how it responds across the whole scale of the keyboard, or all the velocities you could Really dial this in specifically.
And this is voice routing. This allows you to randomly change the destination with every key press. Interesting. However, what I find way more interesting is this performer. This thing allows you to draw in, whatever modulation shapes you want in terms of song structure, song length, loops, rhythmic values, all sorts of edit modes. It’s basically like a little tiny DAW inside of the synth. And rather than me kind of dialing and show this to you,
I’m gonna bring up an example. Where is that one? Here it is. So, using all three of these performers, each one just has a different shape drawn in. You see this, you couldn’t do this with an LFO. Every single use is changing as it goes along. Look at all that, and it’s all routed to various aspects of our wave table, volume, filter… Sort of being used, three different shapes for three different things creates the sound of all these different voices playing. And on top of that, just to show you how this is being used as like a song maker in a sense, we’ve got different versions of it.
So, they created scat one which are these three patterns. Then scat two, three different patterns. Scat three, yet another set of patterns and meditation which is just nothing. Oops, meditation which is just holding the note. And, what’s interesting is that they won’t trigger until I play a new note. So, watch this. Okay. Now I’m gonna hit two but it’s not playing it. It won’t until I play a new note right here. Now three, oh, hold on. And three. And end it with four.
So this really is, it’s like a little mini composer inside of the synth. Again, kinda like the Routing panel, there’s like a million things you could do here. Lastly, I’m gonna show you one more preset as a cool example of what you can do with this Routing panel. And that is… cause I’m obsessed with this Routing panel, Caps Lock.
All right, it sounds like three different synths. That’s thanks to this Routing panels. Let me spread it out a little bit so you can see what’s going on. All right, Oscillator one, going into distortion, and then out. Oscillator two, going into Utility Insert Effect, which is basically like a simple filter that’s going to do a different effect, Delay and then out.
Noise, going into a Comb filter, which is then going out to yet another effect, Reverb. But also, this Comb filter is going out into a Delay Insert Effect. And then a feedback loop is created with the end of that delay going, back into the comb filter. But, on top of all that, our second noise oscillator running through Utility insert effect again, is then being used as our Auxiliary Phase Modulation source, which in turn is modulating oscillator one and our auxiliary sources also being modulated by LFO three.
The reason I like this is there are other synths that have this kind of modular architecture. But, there’s something about this that is easy to see, for me. It’s incredibly complex, but it doesn’t feel overwhelming. I can literally just see where everything is. And I can move things around that make it a little more easier for me to see and understand. I don’t know, it’s just that perfect marriage of complexity and ease that I just love in a good synth.
All right, that’s Massive X. I this is know this is kinda long video but, lots of good stuff in this synth. So, I encourage you to try it out. Make sure you subscribe to our YouTube channel If you need any help with patches, specific patches on any synth, really, head on over to our forum and put in a patch request. And again, don’t forget to try out Syntorial.
Blipbox is a synth made by Playtime Engineering and if the name doesn’t give it away, it’s meant for kids. Don’t worry though, adults can use it too – we won’t tell.
VIDEO TRANSCRIPT
Welcome to a special Father’s Day edition of Synth Spotlight. We’re going to talk about the Blipblox today. This is a great way to get your kids started on synths and it’s actually usable for you as well, depending on aesthetic and the sound you’re going for in your music. So it looks like a toy and that’s obviously for a good reason. It’s for your kid, it’s meant to attract a kid to it.
But each one of these buttons, each one of these little controls actually controls a legitimate synth parameter. So, I’m going to get the sequencer started. You can change the sequence, click of a button. Bunch of preloaded sequences. And then we can start changing it. So you got tempo over here. Got waveforms. Low-pass filter. Sort of a note length. So it’s kinda like an amp envelope decay and release. long notes. Short notes. We also have two LFOs and a mod envelope that you can modulate the oscillator and the filter with.
There’s this randomize button which just changes all the controls that wants to do something random. Giving a whole new sound. Then one unique thing, this thing has this freakout button. When I hold this down, it’s just gonna go nuts. And then we’ve got a kick and a snare. Okay, so number one question here is do kids like it?
Well, I tried it with my two year old son, Ellington who’s almost three and he loved it, check it out. So obviously, he doesn’t understand what these different controls are doing yet, but he’s actually interacting with legitimate synth parameters. He’s interacting with filters, with tempo, with LFOs. Without even knowing it, he’s programming a synth.
And then as he gets older, and then he gets to an age were he understands this stuff, I can start to explain this stuff. I can tell him this is low-pass filter. I can, tell him these are different waveforms changing the raw sound that he’s working with. So it’s a great way to get your kids started. Now, how about you? Can you use this in your music?
This isn’t your ordinary synth tutorial. This is Syntorial. Making programming synths easy. With video game like training teaching you how to program synth patches by ear. Each lesson starts with a demonstration, then a interactive challenge with over 200 lessons. Once you complete the program, you’ll be able to create the sounds you hear using almost any synthesizer. Try the award-winning Syntorial today.
Now how about you? Can you use this in your music? And the answer is yes, but it kinda depends on what you want in your music. This thing is a great little glitchy kinda chiptune Lo-Fi synth. So if you don’t have something like that, and you want that in you music, this thing is great because not only are you getting a synth for your kid, for him to learn, you’re also getting this particularly unique sound to put into your music.
It also has a really unique interphase cause it was designed to kind of look like a toy and not like a typical synth and I find that inspiring. Just kind of learning this thing and messing around with it was just really fun. Now, you’re probably wondering, well if I need to use this in my music. I need to go to control with notes it’s playing, right? I don’t wanna just use the built in sequencer. And so we can do is turn it off, connect your MIDI controller too, which I have done here and I can play it.
So it’s just got a MIDI import here on the back. And you can just do any kind of MIDI output into it and… now you can control what notes it’s playing. And this randomize button’s great. It’s almost like dialing through presets. And of course, I can program my patch myself. Now, the drums we can also edit and play those. Right now my controller is sending MIDI info out on channel one, I’m gonna change it to channel two and now.
My keyboards playing the drums. And if I select these two buttons, I can change the sound of the drums. So, this right here becomes kind of the length of the drum, the amp decay or release. And this is the pitch. Same for the snare over here. This is the length. And this is kind of like a filter.
So there you have it. Really great way for your kid to learn synths, get in there early, and a cool little kind of Lo-Fi chiptune synth for you. All right, that’s the Blipblox. Now, if you’ve got a synth you’d love to see me cover here in Synth Spotlight, please comment below. And don’t forget if you’ve got a patch you need help with, head on over to our forum and request help there. And finally, don’t forget to subscribe to our YouTube channel.
You can check out how to make a simple sine sub at 00:19, a customizable saw sub at around 2:02 and layering at 3:10
Oh, and below are the recipes. Bon appétit!
Simple
Oscillator: Sine
Filter: If you want to bring in more mids to “hear” the pitch better, use a Lowpass filter and crank the Drive.
Distortion: Again, if you want to bring in more mids, add some distortion
Saw Sub
Oscillator: Saw
Filter: Lowpass, 24 dB. Bring the Cutoff way down, and then adjust it to your liking, depending on how much you want to be able to “hear” the pitch. Use Res to lighten it a bit and reduce some of the heaviest bottom end. And use Drive to make it warm and saturated.
Can’t wait to try these out? Come over to the Patch Share forum and show us what you came up with!
VIDEO TRANSCRIPTS
Sub-bass. Simply put, its just a really, round bass. And most commonly it’s just thought of as a sine wave so. That’s kind of your most basic and a fairly common sub-bass. Now to get rid of that little pop at the front, I’m gonna increase our amp attack.
And one really common example of using just a sub-bass all by itself like this is the 808 kick. 808 kick is a kick drum sound followed by this long tail, this long sub-bass tail so I’ll just increase our release and this is what we get. That’s what you hear on those 808 kicks. And so that’s what you’re going for, done. Easy, sine wave, then, you know, this is more about creating this really round low-end that Doesn’t have a real discernible pitch. It’s more just this bottom-end that you feel.
However, if you need to be able to hear the pitch a bit better, if you need to add some mids, so it’s just not this really low round sound. We’ve got a couple options. We can enable a filter, and if you’ve got drive, just crank the drive, bring our level down. You see the higher I turn it up. without, It’s nice, all right, so now we can kinda hear the pitch.
It’s still a big round sub-bass but now we can kinda hear what pitch is going on. I love this technique and it’s little bit of filter drive to it. If you don’t have filter drive, you can try distortion. Sounds different, but the same idea.
However, my favorite way to make a sub-bass, is actually with a saw. Let’s go over here, pop on a saw, filter it, and you can bring that cutoff way down, and pick exactly where you want it to be. You know, so, but want it really round, don’t want it kinda bright, and you can really dial in the exact sound and since we’re using the filter, we could bring in some drive. We can also use resonance If you wanna shape it a bit, take off a bit of the big fat bottom.
So saw through a filter is really the way to go if you really wanna customize your sub-bass to be exactly how you want it to be. Now, in this context, we’ve been using the sub-bass all by itself, but one really common use for sub-bass is to layer it in underneath another bass, particularly one that’s lacking a solid low-end. So for example…
This isn’t your ordinary synth tutorial. This is Syntorial. Making programming synths easy with videogame-like training, teaching you how to program synth patches by ear. Each lesson starts with a demonstration, then an interactive challenge with over 200 lessons. Once you complete the program, you’ll be able to create the sounds you hear using almost any synthesizer. Try the award-winning Syntorial today.
Let’s say I’ve made a, kind of typical classic bass. Something like this okay, that doesn’t sound bad, but let’s say I want a bunch of movement. Let’s say I want it real lush. I go with some unison, oh, that sounds nice, but you notice I really lost that stable, solid low-end. You know, unison moves it pulsates, and I want something that’s solid. Isn’t moving in my low-end.
Perfect opportunity to just layer in a simple sub-bass, hear that nice big bottom presence. It doesn’t change the character ’cause it’s just a sine wave. You know, there’s nothing in it. It’s pure, round, low end. And so what this means is you can, you know, take your main bass tone and do whatever you want to it. You know, the worry about the fact that it’s a bass like let’s throw on a phaser.
And as long as the sub is unaffected, which we can do, by enabling direct out this means it’s gonna skip the effects. It provides a nice, solid, low-end to go with our really active body of sound. Now, Serum is nice that it has this direct out option so we can have a sort of untouched sub-bass, other synths had this too but if you don’t have that, you can just use another synth, just open up a second synth and play the same line and the advantage to that is you can make your sub-bass however you want it to be.
You can go as simple as sine , but you can also do those other things we talked about, like running a saw through a filter, having two separate synths, that’ll really give you the ability to dial in the exact sub-bass you want.
All right, I hope you found that helpful. If you have any patch requests, go to our forum and post there and I or someone else will try to help you figure out that patch. And don’t forget to subscribe to our YouTube channel.
Since we’re so nice, we wrote down the synth recipes for your convenience:
Simple & modern:
Type of Synthesis: FM
Operator Routing: 2 -> 1
Operator 1
Waveform: Sine
Operator 2
Waveform: Sine
Pitch Ratio: 2:1
Amp Envelope: Sustain between 0 and 80%, quick Decay
Level: Between 80% and Max
Bit more complex, and classic
Type of Synthesis: FM
Operator Routing: 2&3 -> 1
Operator 1
Waveform: Sine
Operator 2 will give us our electric bass tone
Waveform: Sine
Pitch Ratio: 1:1
Amp Envelope: Max Sustain
Level: Between 60-80%
Operator 3 will give us our attack transient
Waveform: Sine
Pitch Ratio: 7:1 (adjust to taste)
Amp Envelope: Sustain at 0, quick Decay
Level: Between 70-80%
The Dexed download link is right here. No, not the word “here”, the orange ones. You missed them, go back. Yeah.
As per usual, the patch challenge is up and running so you can upload your version of an FM bass to the forum and discuss whatever you want with fellow Syntorians. Upload away!
VIDEO TRANSCRIPT
FM bass, this is a pretty basic FM synthesis patch. It’s a great way to learn how FM synthesis works. So you don’t have to have any prior knowledge of FM synthesis. I’m gonna show you how it works as we go.
This synth is dexed. It’s a free VST/AU for Mac and PC. Link to download is in the description below. So what do we have here? Well, we’ve got six separate oscillators, or as they call ’em in the FM world, operators. And they can only generate a sine wave. You can’t change the waveform like you can with subtractive and wavetable synths.
So how do we get interesting sounds when all we have is a sine wave to work with? Well, that’s where FM comes into play, frequency modulation. Operator 2 is routed so that it modulates operator 1. We can’t actually hear its audio. If I turn its level up, we won’t hear another sine wave. Instead, as we increase this level, it modulates operator 1 more, and ends up changing its tone. Listen. It makes it brighter, but it does it in a very unique FM way, in this kind of metallic, stringy way.
And we can change the nature of that brightness with operator 2’s pitch. By raising it, you’ll hear that tone become more metallic and higher up, listen. Now FM synths control pitch in a bit of a different way than what you’re probably used to with subtractive and wavetable synths. They use pitch ratios, which very briefly means they are multiplying the frequency of the pitch.
So F equals two means we’ve doubled the frequency, which equates to one octave. Three means we’ve tripled the frequency, which equates to an octave and a fifth, and it goes up and up through this thing called a harmonic series, which you can look up. There’s plenty of information on that. I’m not gonna talk about it, ’cause you don’t need to know it. All you need to know is that this Coarse knob, as you raise it, it changes the nature of that brightness, makes it more metallic, makes it higher.
I’m gonna keep it at one right now. So it’s the same pitch as operator 1. Where things get interesting is when we modulate the level of this operator. So this level is its volume. As we increase its volume, it modulates operator 1 more. Therefore, all we need is an amp envelope to modulate this level, and that’s what this is right here!
So I’m gonna take the sustain level, right here, turn it all the way down, and I’m gonna take its decay rate, which is right below, and right now, it’s so fast that it just jumps down. That’s why there’s nothing here. I’m gonna slow it down. And what do we get? Right, so it’s taking this level and it’s shooting it down. It’s creating our basic starting FM bass.
Now, if you’re listening closely, you kinda hear some noise in there, this crackling sound. That’s just something this synth is doing. I don’t think other FM synths do that so much. It might just be a small shortcoming of this synth, but hey, it’s free. And you can kinda reduce it a little bit, by bringing our low pass cutoff down. Just takes some of the highs off. It’s still kinda there, but… Okay, so that’s a basic FM bass, right there!
Now it modulates all the way down to zero, leaving us with a sine wave. Here we have a sine wave, but maybe you don’t want that. What if you want there to be a little bit more in your sound after that attack transient? Well, you could raise that sustain level back up. Oh, yeah, maybe right there. Eh, maybe there. You get to decide exactly where it ends.
And watch what happens when I raise this pitch up one octave. That might sound more familiar. This is a very sort of modern approach to FM bass. It’s nice that it’s simple. Maybe I don’t want it to be as bright. There we go. All right! So that’s our first FM bass. Kind of modern-sounding, real basic approach. I wanna show you one more approach, more complex approach, that’s gonna get us more of like a classic ’80s-style FM bass.
This isn’t your ordinary synth tutorial. This is Syntorial, making programming synths easy, with video-game-like training, teaching you how to program synth patches by ear. Each lesson starts with a demonstration, then an interactive challenge, with over 200 lessons! Once you complete the program, you’ll be able to create the sounds you hear using almost any synthesizer. Try the award-winning Syntorial today.
I’m gonna remove this modulation here. Go back down to same pitch as operator 1. And I’m just gonna use this to get our timbre. I wanna get kind of like an electric bass, like an actual string electric bass tone. Yeah, maybe there. And if you wanna get rid of those pops and clicks, put a little bit of an attack on operator 1. That’s not bad, how ’bout, and then the release as well, we wanna have a little bit of a release.
Okay, now, I want to take operator 3 and modulate operator 1 with it as well, use that to create our attack transient. ‘Cause I’m missing that at the beginning, all right? It’s just kind of a muted sound. Now you could stick with this if you just wanted this simple, plain electric bass tone; it’s perfect. But I want some attack transient on there, and I’m kinda going for that more classic-sounding FM bass.
The problem is, by default right now, operator 2 is modulating operator 1, but 3 is not operating modulator 1. That’s where we come down here to the routing of an FM synth. So the way they do it in dexed is, the operator numbers that are on the bottom row are the ones we can actually hear. So we can hear 1, we can also hear 3. And then, up from top, we have a sort of cascading modulation, so 2 modulates 1, 6 modulates 5, modulates 4, modulates 3. We don’t need all that. I need 2 and 3 to both be modulating operator 1. So I’m gonna change the algorithm. There’s a lot of ’em.
The one I found was right around here. 2, 3, and 5 are all modulating operator 1. I don’t need 5, but I got what I want out of this, 2 and 3. Okay, so right now, we still just have 2 modulating operator 1. I’m gonna increase 3, and use the amp envelope to create an attack transient, just like we did before. Let’s go up to two. It doesn’t quite sound like it did when we were using this operator, right? Because now we have two operators modulating operator 1, so it’s gonna change the nature. They’re gonna interact in an interesting way.
I’m gonna go up to seven now. Now what do we got? Let’s go a little faster. Back off on this a little bit, there we go. And maybe ease off here. There it is! A little bit more of a classic-sounding FM bass. And of course, I could try other pitches.
So there you have it, and as you can see, there’s a million ways you can create an FM bass with an FM synth, all with varying tones! Let me show you one example that came with the presets, FM bass. This uses all six operators. Different routing here, so we’re actually hearing 1 and 3, they’re sort of layering two sounds together and using the other operators to create the tones for each of those.
All right, so there is a Patch Challenge over on our forum, syntorial.com/forum. Go there, and I wanna hear your take on FM bass. Download dexed or use whatever synth you have, and then post your patch there and talk about it a little bit. I wanna hear what you can do. And while you’re at that forum you can also create new topics and request other patches. So if there’s a particular patch from a song you wanna know how to make, post there, and I or someone else will help you make that patch. And of course, subscribe to our YouTube channel to get more videos like this.
Gather ’round children, cause this tutorial is com-pre-hen-sive. Sicko Mode has a lot of contrasting features and this tutorial covers four tracks: two basses that magically get along, hi-hats that create a ton of bounce and whatever that organ ditty is.
If you’re interested in a particular track, here are the timestamps: 1:14 – Growl Bass 6:46 – Sub Bass 11:48 – Drums 14:18 – Organ-ish
You can download presets, midi files, and logic session right here and as always, feel free to join us over at the forum if you want to talk, or more precisely, type.
VIDEO TRANSCRIPT
Welcome to Making the Beat. Today we’re gonna recreate Travis Scott’s “Sicko Mode.” In the description, there’s links to download midi files, presets, and for you Logic users, the Logic session.
There’s four tracks here: drums, two different basses, and a kind of organ-ish sort of sound. And if you’re only interested in one of those, you want to jump ahead to it. In the description, there’s also links to different times in the video.
Now, I’m gonna start with the basses ’cause there’s two of them, which I find really interesting. Usually, you don’t have two sounds occupying the low end. Two basses would typically fight a lot. It would create a lot of mud, but these work cause they’re very different. You’ve got a sub-bass, and then you’ve got this growl bass. All right, so this is up in the mids , the sub is just below. So they play well together.
All right, so let’s start with the growl bass. I’m gonna turn our volume down a little bit, and the notes are real simple. It’s just several D’s. Now by default, Massive has this little bit of decay on their amp envelope, let’s get rid of that, so we have a solid envelope.
Okay, first thing’s first, we want a saw wave, and we actually want two of them. Except the second one’s gonna be an octave lower. All right, good start. Now we’re gonna send them both to filter one. And this is where we’re gonna get the EEOWWM We’re gonna take an envelope, we’re gonna modulate the cutoff of a band pass. So it kind of goes ‘eeowwwm’ like that.
Let’s take an envelope here, route it, turn it up, and we want to go all the way down with that. Now, for a band pass we really want to hear the filter, the ‘eeowwm,’ we want to give it kind of a juicier sound, so we’re gonna increase the resonance. There it is. Let’s turn it up a bit. All right, so that’s the decay. It’s taking the cutoff, starting it here and moving it down.
Now, we can make this linear, which means it’s gonna hang out at the top a little bit. And I actually found that sounded closer, and I kind of like the linear shape ’cause- since it hangs at the top more, it gives the sound a little bit more fatness almost, the note’s there a little bit longer before it sweeps down. As opposed to the curve version, which kind of lingers at the bottom. This sounded more like the sound.
All right. Now, at the end of this longer note, you hear it lingers at the bottom, and you get this kind of ‘whoom,’ this sort of jump in the low end. Listen, that ‘whoom.’ We don’t want that because there’s a sub-bass, right? We don’t want any low-end in this bass patch, otherwise it’s gonna butt heads with the sub-bass. So, we’re gonna make this serial, which means filter one is now gonna run into filter two.
We’re gonna grab a high pass, and we’re just gonna take some bottom end off. Turn us up to about here. Huh, it’s gone. Listen. There it is, I had to set this to mix two. When it was here, I was hearing both some of this filter and some of this filter. We just want to hear filter two. The oscillators go into filter one, then two, and that’s all we hear. All right, listen to filter one . Hear that ‘hughn?’ That’s gone.
Good, all right so now this sounds really puny. We need distortion. So I went with tele tube, crank this and crank the drop. There it is. Now that sounds pretty good until you compare it to the original Way nastier. It’s ballpark. I tried out some other ones, classic, brauner, but tele was the closest, so I was like, how can I make this nastier.
Well, come down to this insert and we can layer in another distortion. And I found if I had hard clipper all the way wet, listen to what happens. That gets us. Now, here’s what’s interesting about this hard clipper. If I turn this off, let’s turn them both off in fact. And turn this on, it’s not that much of a difference. Off on It just sounds a little bit louder, but it makes a huge difference when this is on. So hard clipper off, tube on. Hard clipper on. Oh, the combination of these two is really nice. So let’s hear it. All right, maybe a little more of this. And that’s our growl bass.
This isn’t your ordinary synth tutorial. This is Syntorial. Making programming synths easy with videogame-like training, teaching you how to program synth patches by ear. Each lesson starts with a demonstration, then an interactive challenge, with over 200 lessons. Once you complete the program, you’ll be able to create the sounds you hear using almost any synthesizer. Try the award-winning Syntorial today.
Sub bass, we’re gonna start with Serum, and again, we’re gonna use some raw saws. I’m gonna turn the volume down a little bit for now. What do we got. So this is also a bunch of D’s with one high D jump. And, what makes this one really interesting is that some of the ends of the notes bend up in pitch. Sometimes they bend up a fifth, sometimes they bend up an octave. I thought a great way to make sure you can bend it up a fifth and bend it up an octave using the pitch bend, is to first set the up direction for seven semi-tones, which is a fifth. All right, “duh-uuup” that’s our fifth.
Now here at the end I want to go “duh-ahh,” much higher, up an octave. So what I did is take the lower one, the downward direction, and make that up, whoops, one octave. So that way you can take your pitch wheel and either go up a fifth , or if you press it downwards it’ll go up an octave. That’s better than sending up to an octave and then trying to find the fifth halfway. This gives you precision. And this way you can record it in real time, not have to draw it in from the scratch, which I like to do.
So now, when I go up here, it’ll get up a fifth, and when I go down with my wheel here, you’ll actually go up an octave. Good, and what I did is I recorded with the pitch wheel and then I went in and just kind of tweaked it, made it bend exactly where I wanted it to bend.
Okay, let’s set ourselves to mono, and I’m gonna crank our oscillator volume here because we’re gonna drive this filter. I want as much going in as possible. Now, this is a sub-bass and you might be thinking, why aren’t you just using a sine? I love saws for sub-basses. I love taking the filter all the way down to get that nice rad sound. I can decide exactly where I want it, how much maybe like low-mids that I want in it that come from the saw, and I can drive it, and I just get a much nicer, warmer sound from a saw.
Whereas a sine can give you a little bit more of a hollower sound when you try to drive it and do things like that. So, we’re gonna do a 24dB moog-style filter. Turn it down here, crank the drive. Yeah, that drive gives it that nice, warm subtle growl. I’m gonna turn on key-tracking because we’re playing two notes an octave apart. That higher note’s gonna be a little rounder than the lower ones. Key-tracking will help even that out. Good, compare it to. It’s subtle, but it makes that higher note brighter.
Okay, and then I’m gonna boost the res just a little bit, just to make it a little less flat, a little more shaped. Yeah, there it is. Okay, amp envelope, I’m gonna turn up our attack just a touch, make sure we don’t get any pops and clicks, at least less of them. And then I’m gonna add a subtle decay. Right about here, and it’s really subtle. And now listen to it without it. Kind of sounds stiff without it. With it. It’s just kind of nice and almost, it sounds a little more like an actual bass. There’s just this subtle movement in it, give it just a subtle attack transient. That’s kind of stiff, this has a bit more life to it. Nice.
All right, finally, compression. We’re gonna even out the higher notes a little bit louder than the lower notes. This might help even it out a bit. And I actually like the default settings for this. Just kind of tweak the threshold, makeup gain. Compare it, little louder. We don’t want to distort. All right, sub bass!
All right, next we have the drums. This is a pretty standard trap sounding kit. This was Logic’s built-in one, Trapdoor. All right, what I like about this drum track are how the hi-hats are used. First off, you got two different hi-hats, this real sharp one, and this more muted one on the left side. And then there’s also an open one. And how these hi-hats all play together creates all of the bounce in this track. And it’s all about volumes and velocity, so I’m gonna mute the sort of soft one.
Let’s look at just this pointed one. If I highlight them, take a look at the velocities. So a lot of them are quiet. The ones on the &s of the beats are louder. And then even this little sixteenth-note roll here has different velocities, listen to this. Duh, da, da, da, duh, da. So you get this accent, pu-pah, bum. You may not think that makes a huge difference until you hear it… Until you hear it without it.
Let me just take an incredibly long time to click all these. Now, I’m gonna drag them up, so that they’re pretty much all the same. Look how stiff that it, da, da, da. Now listen to this. Bah, uh, it almost starts to phrase it. Puts all this bounce in it. And then when you bring in this quieter hi-hat. This one’s on the left side and it’s quieter. So you’ve got velocity with the right hi-hat, quieter with the left hi-hat. It’s just so much bounce, and then we bring in kick in the snare. All about those hi-hats. That’s the drums.
Next up is that kind of organ-ish patch, and to be honest, I think it’s probably a sample. It sounds kind of organic, it’s got a sample vibe to it. But I thought it’d be interesting to try to recreate it using a synth here in serum. I feel like I got pretty close, maybe 90% of the way there, and it’s just interesting how we can get this sort of like trippy, organ-ishy, sample-y kind of sound using just a synth.
The first thing I’m gonna do is bring our volume down. And right now just short little stabs, but it rings out, right? So, I want some release, some nice long chords. And these are three-note chords, so make sure they don’t overlap each other and create mud. I’m gonna make our synth 3 voices, so that these three voices will ring out, and then when the next voices come in it’ll cut those old ones off.
Now, it’s two different chords, and by themselves it’s an F# minor, that’s inverted, and a C# major. But, the bass is playing a D. So really, it’s a little more complex than that, and it sounds pretty dissonant. So in reality, it’s more of like a D major 7 and a C# over D poly-chord, whatever. I doubt that, when they were making these chords, they were thinking about the analysis of the harmony. It was probably, they were just messing around on a keyboard, or, if these are samples, it could have been like the one hits off a sampler. Either way, the end harmony shows why it’s so dissonant and gives you that kind of vibe that it gets.
All right, so let’s look at our oscillator. I’m not gonna use a saw for this. I wanted something kind of organ-y, and really I just experimented until I found one that I liked. I ended up going with this cream. Good organ vibe. Unison. And it’s a narrow sound, down the center only.
And then there’s this really cool fluttering in it. So, I took an LFO to modulate the oscillator’s volume, and to do it really quickly. And I ended up switching to a, uh… sine. Really subtle difference, but the sine, since it’s curved, it spends a little more time at the top and bottom, so it give us a bit of a stronger flutter.
Okay, next, I want to shape it with the filter. Now, it’s got this really kind of shaped, super resonant, peaked kind of sound, so went with a band pass 24. And I’m gonna drive. Good. And to really get that peak to push out, I crank the resonance Yeah. And when I crank the resonance, I typically also turn up fat. That kind of makes up for any low-end you lose in your resonance. This is a band pass, so it’s not totally necessary, but it ended up giving us a nice volume boost as well.
All right, next we’re gonna make this thing super reverb-y, very wet. We’re gonna do that with a plate reverb because it give us a width option. Again, we want this to be in the middle, and we don’t want a wide sound . Yeah, and I don’t want any dampening or high-cutting or anything like that. Really want to let this reverb fully ring out. And pre-delay separates our dry sound from our wet sound a little bit with a little bit of time. I don’t want that either, I want this thing drenched. There it is.
Okay, so along with this flutter here, we also have this sort of slower like “whoa, whoa, whoa” tremolo. Normally, I’d route an LFO to our oscillator level, but that’s already being fluttered by LFO 1. So instead I’m gonna switch my filter to level, which just makes it like a volume knob at the end of the filter, and I’m gonna modulate that instead. Gonna go a little faster . And again, I’m gonna switch to a sine wave ’cause a triangle wave shoots down pretty quick, and I want this to start at the top, and kind of like how with Massive in the growl bass, we switched to linear as opposed to having it shoot down faster, this curves upward compared to this shot down. So we get more time at the top. It gives us a bit more of a prominent attack transient, a fatter.
Okay, now, there is one more thing I want to show you, and that is the second chord is brighter than the first. So I routed our mod wheel to the cutoff, just a super small amount, and opened the mod wheel, turned it all the way up as I played the second chord, giving it kind of like an opening wah sound. I love that. And that’s your organ style patch.
So all together. All right, I hope you found that helpful. If you want to request that I do this for a different song, or even just a specific patch, head on over to our forum, syntorial.com/forum, and post your request there. While you’re at the website, check out our blog. There’s tons of videos and articles and stuff like this. And don’t forget to subscribe to our YouTube channel at the bottom right corner of this video.
Today we’re covering u-he’s Diva. More specifically, the fact that it that allows you to mix and match components however you damn well please.
Curious to see what classic synths each of Diva’s modules emulates? This here reddit thread answers that question for you, so I don’t have to. God, I love the internet.
Have any suggestions for future synths to spotlight? Drop a comment below!
VIDEO TRANSCRIPT
Welcome to another edition of Synth Spotlight. Today, we’re gonna talk about Diva. What makes it different from other synths? What makes it awesome, why you should care.
In a nutshell, it’s an analog emulation, but it’s different from others for two reasons. Number one, the quality is hard to match, just listen to this default patch. So warm it’s just beautiful. You told me that was analog I’d believe you. But on top of that, to go along with this quality is this flexibility and semi-modularness, that’s really interesting.
This section up here, right now is emulating a Minimoog Model D. But you can swap up each component to emulate a different classic analog synths. So for example, DCO gives us a Juno-60 oscillator, but we’re still with our Minimoog ladder filter. So we can mix and match different components, we’ve got five different oscillators, five different filters, a few different envelopes. So you can get these almost like Frankenstein analog synths, or you can emulate in an analog synth specifically and accurately.
It’s kind of up to you. And on top of all that is this section down here that is more of a standard digital plugin kinda section. You got both legend LFOs, effects, this whole trimmers section which I’ll talk about. So it’s this combination of awesome analog sound with digital plugin flexibility. So let’s jump right in. I’m gonna hop over to the preset section, go to templates, and we can draw up a specific synth.
I’m gonna go back to the Minimoog, and here we are. Now, the Minimoog is known for a lot of things, but one thing that was great was its basses. So I’m gonna make a bass here. And one of the things that really gave its sound was its filter known as a ladder filter put down a bit Just a nice sounding warm filter. Let’s add a little bit of filter or envelope We’ll switch to mono Oh, beautiful. Emphasis is resonance and if you really wanna push the saturation, this filter, we have this feedback knob which drives it. Awesome sound.
Now here’s an example of mixing and matching over here in our envelope, attack, decay, sustain. No release by default, the hidden release stage is just instant. However, if you enable the release switch now it’s controlled by our decay knob. Let go and it releases at this decay rate. Let’s go faster. Okay, that’s fine, that’s the way the Moog was, so they’re doing an accurate emulation here.
But what if you want a full ADSR, let’s switch over to a different one ADSR. This is modeled after Roland Juno Synth. So here’s a great example, I want the Moog sound, but I hate the limitation of no release stage. Okay fine, switch, so now we have everything Moog except for our envelope. Another thing I love about the Moog is the wave forms can be morphed so, All right, still having to jump between square saw So like for example, I’ve got a saw square hybrid here. A
ll right, so now, because we’re using this type of oscillator, this Moog emulation, we get to have a bit of a waveform morphing feature. And then one more example of digital flexibility here, the Minimoog’s a monophonic synth, one note at a time, but this is a plugin, so let’s switch. Now it’s a polyphonic Minimoog. Mix and match. All right, let’s try another emulation.
This isn’t your ordinary synth tutorial, this is Syntorial, making programming synths easy, with videogame-like training, teaching you how to program synth patches by ear. Each lesson starts with a demonstration, then an interactive challenge with over 200 lessons. Once you complete the program, you’ll be able to create the sounds you hear using almost any synthesizer. Try the award-winning syntorial today.
Let’s hop over to the Juno 60. Okay, like the Moog, you could do various things with this synth, however, one thing that was great about this synth was these warm lush pads. We’ve got pulse width control over here, controlling the pulse width of this oscillator’s waveform, being modulated by an LFO, so we get this moving washy sound and it’s layered in with a saw. However, we have multiple types of saws here. This one’s particularly nice. So I’m gonna do a nice filter synth ’cause this filter is great.
Let’s go a little bit brighter. So we’ve switched over to a different synth to get a different sound, and it sounds excellent. Now, another advantage to this oscillator compared to the Moog is this second section here. In the Moog, it’s locked in, right? This mixer comes with this oscillator, but when we switch to any of these other ones, becomes its own separate section, so right now it’s a simple high pass filter.
It’s doing nothing. I could jump up to three, to cut off some lows or I could boost the lows. So we get a bit more bottom-end out of our sound, but what I really wanna do is switch this feedback option. This is the feedback knob from the Moog. So now we are stealing one specific feature from the Moog so that we can drive this filter. Nice extra saturated Juno filter.
Okay, now I wanna look at another one of their presets. This is Digi-Uhbie, so this is a kind of a hybrid one they’ve created. Over here, this digital oscillator is a Jupiter 8000 and over here is their own kind of unique filter. It’s a combination inspired by a couple of different Oberheim+ filters and one other filter. And so what is our sound right now? This is big. Huge washy unison sound. We get this from our supersaw over here.
So the Jupiter 8000 had this supersaw, which is essentially like a unison saw. I’m gonna set the mix to once, we’re only hearing this oscillator and this is kind of like sort of a unison detuner They may think, “Well, big deal, I can get unison detuner on most synths now.” But the thing about classic, the supersaw was the unisons back then weren’t perfect, and that sort of non uniformness of it gave you a fatter unison. So with our Jupiter, we’re getting this awesome big, supersaw sound.
Now, we could make this a more accurate emulation per se. Switch back to cascade. This is the filter we saw when we were messing with the Juno-60, Roland used the same filter in multiple synths. So this gives us a more true Jupiter sound, I guess you could say. But the Uhbie sounded pretty awesome. It’s an aggressive filter. It’s really cool, so look, we’ve now, we’ve created a unique analog sound, one that you can’t get with any specific synth, only in Diva can you get this combination.
To go along with the supersaw as well, we’ve got some pretty unique waveforms over here, some noise And you can kinda morph them, down here, I like this, it’s kind of a sine saw. Oops sorry wrong knob, this one. Right, we can mix in a sine wave. Give us a nice fat saw, but for me it’s all about this supersaw, that’s why I love this oscillator.
Now, if you wanna learn exactly what each of these oscillators is emulating, which synths they’re modeling after in each of these filters, there’s a link below in the description, it’ll take you to a Reddit post where someone went through each one in detail and talked about what it’s emulating. And one thing you can do is you can kinda go and learn about each of those synths, learn about what they are great for, people really loved them for. They’ll help you give you an idea of what kind of sounds Diva can be great for.
Now, before we finish up, I just wanna hop down here and talk about a few features in this digital section. In our Effects section, got a pretty standard selection. I kind of like in the chorus, you have few different types. In particular, this ensemble ones, so check that out. In our delay, there’s this wow knob, which is basically, it makes it kind of wobble.
The pitch wobbles a little bit, giving us a tape echo, that old school kinda analog delay synth. Another nice little analog touch, which you can dial it in, how analog do I want it? Do I want just a little bit of that perfect digital or some heavy tape delay?
And then one other kind of unique one, rotary, this emulates a Leslie cabinet, which you’re usually paired with Hammond Organs. And the ModWheel as you turn it up will make it go fast. You don’t often see this kind of effect in a synth so I just thought I’d point it out. Now, another interesting aspect of digital flexibility applied to analog synth is this section here, is trimmers.
This allows us to kinda put into some randomness some variants in our sound. Classic analog synths they weren’t perfect, it’s just the nature of the beast back then. So things like pitch drift, where the pitch wasn’t always the same, kind of like bend a little bit here and there, or just any element of it not being absolutely perfect was part of the analog sound. This allows you to actually control that. In particular, this oscillator voice detune section is interesting. So let me step away from it for a second. Let me go up to the Moog. Crank all three oscillators. I can detune them here.
All right, we got a nice detuned sound However, I have another option. I can do it down here, but this time I can do it differently for each voice. So I hit a key and it will be controlled by these knobs. I hit a key again and now the voice detune is controlled by these knobs.
So for example, this is oscillator one, I’m gonna leave it there. I’m gonna detune oscillator two up a bit, oscillator three down a bit. I’ll leave this one the same. In fact, I’ll do it extremes, so you can hear the difference. Now watch the light. No, detune. Heavy detune. Now that’s weird and extreme, so let’s do something a little bit more, subtly different. so that’s something someone might not even notice, but as I’m playing, it’s gonna just vary a little bit from note to note. So we’re adding this sort of randomness in there, again, making it less and less perfect, but in a very intentional way.
One more feature, accuracy. So U-he Diva is very computer hungry. The reason it’s so great is because it uses lot of your computer power. And they’re very transparent about this, they tell you that right out front. They also give you the ability to dial it back though, by that divine, that’s the best possible quality. But if you’ve run into issues where it’s just pushing your computer too hard, you can dial it back as far as you need to.
And you can use your ear too, some patches you won’t hear as much of a difference, other patches you will. So as you’re changing settings, just listen, how does the sound change? That’s just a great trade off, so you can get the diva sound regardless of the power of your computer.
And lastly, check out the user manual, in particular it’s a good user manual. It’s written, written really well, easy to follow, understand, there’s like tutorials in there kinda and even patch recipes and stuff like that, its a excellent user manual. Right, if there’s any other questions you have that I haven’t talked about, comment below, happily answer.
You can also hop over to our forum and start a full on conversation. And don’t forget to subscribe to our YouTube channel, like to post videos like this every week or two, whether it’s about a specific synth or a specific little synth quickies in which I show you how to program different types of patches and things like that.
We've detected you might be speaking a different language. Do you want to change to: