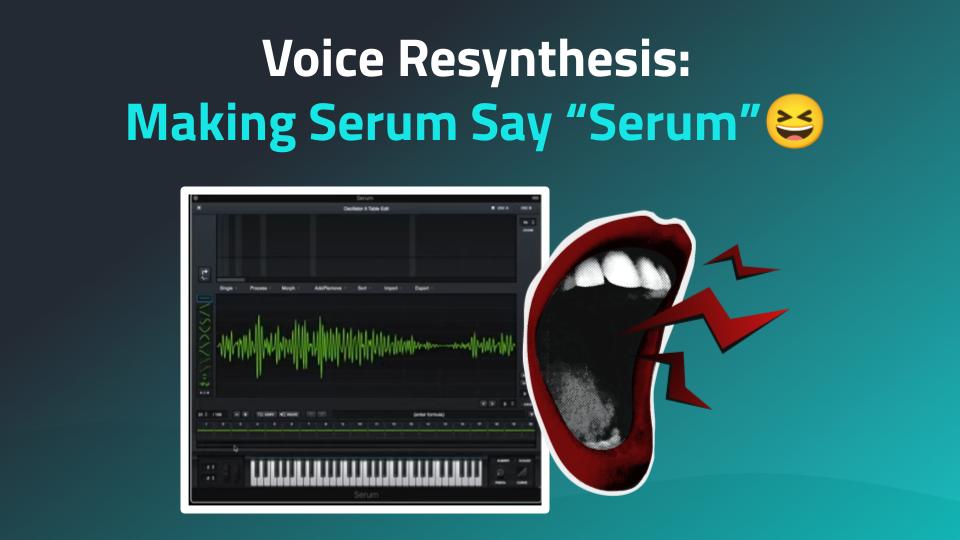
Serum isn’t just a wavetable synth—it’s a vocal synth too. Well, kinda. You can feed it a recording of your voice and turn it into a playable synth. So let’s make Serum say “Serum”.
Note: This is not about creating a simple sampler; rather, Serum analyzes the audio to capture the essence of the vocal in a process that breaks it up into subtables. This method allows vocal resynthesis from audio inputs. This isn’t an AI singing generator either (duh!). It won’t make your voice sing lyrics or hold a melody like the popular AI tools out there. Instead, you’re shaping your voice into a playable synth sound—more robotic than human.
Become A Synthesizer Pro
Master how to program a synthesizer with Syntorial and remake any sound by ear. Download the demo and try the first 20 lessons, on the house.
First, record yourself saying “Serum” and import the file into Serum’s wavetable editor. Serum will break it up into 256 tiny waveforms (subtables). The result? A rough, choppy version of your voice that kinda sounds like a robot learning English. Not great yet, but we’ll fix that. Note that I’m intentionally over pronouncing.
Selecting the Optimal Number of Subtables
You can compare different Fast Fourier Transform (FFT) import sizes (256, 512, etc.) during import. This will affect how smoothly the word “Serum” appears as you modulate through the wavetable. In our case, 256 gave the cleanest result. Try different settings to see what works best for your recording.
Cleaning Up The Voice Wavetable
Now, trim the silence at the start and any extra noise at the end. Then, delete 3/4 of the subtables. This will make the playback jumpy at first, but don’t worry—we’re about to smooth it out.
Making The Vocal Resynthesis Playable
Here’s the magic: turn on Spectral Morphing. This blends the subtables together, transforming the choppy mess into a smooth, playable vocal synth.
Conclusion
With a little editing, Serum can take a simple word and turn it into a custom voice synth. Try it with different words, tweak the settings, and make your synth talk. Or scream. Or whisper creepy things in your track. Your call.
And here is a more in-depth video (10 minutes long) from our Serum Lesson Pack:
Recently I had a lesson with one of my 1:1 students, & he asked me to dissect how UK bass sounds are made. I was delighted to open up Serum and put the pieces of the puzzle together, and I want to share how it was made. So… In this … Read more
Proceed with caution, lest your face be melted off.
Recipe
Oscillators:
4 oscillators total – Osc 1-3: Saw wave, 9 voice unison, with the unison detune amount turned up to where it juuuuust starts to sound a little out of tune. This detune amount will give you the aggression you’re looking for. Also max out the Unison width so we get a big wide sound. Then detune Osc 2’s overall Fine pitch down a bit, and Osc 3’s up a bit. Now you effectively have a giant 27-voice unison. FACE. MELTED. – Osc 4: White noise. Pitch it up 4 octaves and high pass it. We just want really high, hissy white noise. Also apply the same unison settings as Osc 1-3 to get a big wide sound. And dial up the volume so that it’s very audible, but blends into the other saw oscillators
Filter
High Pass, 12 dB slope. Turn up the cutoff just enough to take some of the frump off the bottom.
Amp Envelope
Bring the Sustain down pretty far, and make the Decay fast. Then bring the overall volume up to compensate for the volume lost with the low Sustain. Now we have strong attack transient.
Distortion
Dial in just a little bit of aggressive clip-style distortion. It’ll fight with the pulsating unison voices, and make it a bit angry. Don’t go over board here. Just a tad.
Reverb
Big size, pretty wet. Dampen it to remove some highs, so that only the body echos throughout the caverns.
Compression
Spire’s X-Comp knob is brilliantly simple. I just turned it up halfway and it squeezes the sound, making it even more aggressive. But any compressor will do. Just bring down the threshold until it starts to tighten up.
Can’t wait to try these out? Come over to the Patch Share forum and show us what you came up with!
VIDEO TRANSCRIPT
In this tutorial we’re gonna make a giant supersaw trance lead. And the key to this sound is basically just a saw wave with tons of unison. However, if you really wanna make a big, hard-hitting one, there’s a lot of subtle changes you need to make to really get that big sound.
I’m using Spire, and as you’ll see, there’s a couple reasons why it really lends itself well to this sound. But really, any synth that gives you big unison, lots of unison voices, you’ll be able to achieve it with that synth. So, let’s get started. Here we just have, good old, plain saw wave. And we’re gonna switch over to mono. One voice at a time. And, we’re gonna get right into it, unison.
So Spire gives us up to nine voices, and the more voices, the better. So, I’m gonna do all nine, as many as I can. And we’re gonna go full width. Nice wide, big sound. De-tune is key here. As you turn it up, yeah you get a more de-tuned sound, but that lends itself to kind of an aggressive tone. Listen to how it just becomes a little angry. So you can kinda dial in how much anger, how much aggression you want in the tone of your lead.
I’m gonna go right about there. Now, Spire has something unique which really helps with this and that’s this density knob, which, kind of messes around with how the different voices, in this case, all nine, how they’re spread out exactly. Right now we’re getting a very clean, uniform spread of our nine voices.
This is actually meant to emulate something called a hypersaw, which you see on the Access Virus, a famous synth. But if I crank the density, it’s gonna become a supersaw, which emulates something we saw in an old Roland, JP-8000 synth, it was a classic sound and it’s still used today because it’s this big, supersaw. Hear how aggressive and kind of messy it is? It’s that imperfect analog, versus clean hyper digital. Either one works, this is really taste, but we’re going for big, aggressive, trance, supersaw lead, so I’m gonna supersaw, full density.
Other synths will sometimes give you control over the spread, like Serum lets you really get in and dial how these things are spread out in a more complex manner. But in any case, you’re fine with either one. I just like this supersaw, ’cause of how big an aggressive it is. Now, I wanna go even bigger. But I’m maxed out at nine. So I’m gonna bring in two more oscillators with the same settings and de-tune them.
So, here’s oscillator one. I can copy, go to oscillator two, and paste. Go to oscillator three and paste again. So now, all three, one, two, and three, are both these big nine voice unison saws. I’m then gonna take oscillator two, turn it up to the same volume as one. And I’m gonna de-tune it up a little bit. Let’s just see how much. Bring in oscillator three and de-tune it down a little bit. Alright, so now we effectively have like a 27 voice, supersaw, this is a massive sound.
Now, on the top of our sound, we have that kind of washy sizzle, the shh. That’s just what happens when you put together a ton of de-tuned saws. I wanna emphasize that even more by layering some white noise. Oscillator four. And I’m gonna turn on the other oscillators for a second so you can hear this. So right now it’s a saw, switch to noise. Now, the key here is you’re gonna have to filter it separately from the other saws. And Spire gives us this built right into the oscillator itself.
If you’re using another synth, and you have like a second filter, ’cause we’re gonna need to use our main filter for something else, you can use that separate filter to shape the noise in a way I’m about to show you or you could just use a whole other copy of the synth, a whole other layer. But right now it’s low-passed. So we’re just getting this low, kinda gross round noise. We want this bright, sizzle-y top, so.
Switch to a high pass. Now we’ve got rid of the bottom and we just have the top. And this also has a big resonant peak in it, I wanna get rid of that. And it needs some width. Very nice, now. That’s kind of a rare feature as well, I see that in Spire, I don’t see noise width in a lot of synths, so, again, another key feature here. I’m gonna bring back in my other oscillators.
Now, this noise is still a little too bottom heavy. Even though it’s high-passed, I want it brighter, I want it higher. So I’m gonna pitch it up. There we go. Alright, so now we have this big, de-tuned washy sound. And this has gotta be bright and cutting, and some of these lower notes, there’s a lot of low end and body. I actually wanna remove that, so I’m just gonna grab, basic high-pass. And by default, Spire has a filter envelope, so I’m gonna get rid of that. And then I’m just gonna take off.
We don’t wanna get rid of too much of the body, we this to be a full sound, but I just wanna get rid of that big bottom. Okay, so we’ve established our sound. Now I wanna give it more bite, more impact, really drive it home. But before I do, just a quick word about our synth training app, Syntorial.
This isn’t your ordinary synth tutorial. This is Syntorial. Making programming synths easy with video game-like training, teaching you how to program synth patches by ear. Each lesson starts with a demonstration. Then an interactive challenge. With over 200 lessons. Once you complete the program, you’ll be able to create the sounds you hear using almost any synthesizer. Try the award winning Syntorial today.
Alright, so the first thing I wanna do is, create an attack transient, want this thing to really hit on every single note. We’re gonna use our amp envelope for that. So right now, we just have max sustain, there’s nothing really happening, it’s just on, off. So I’m gonna bring our sustain down. To about here. And, so you can hear what’s happening I’m gonna give it a long decay for a second. So you can hear, over this decay, it’s just getting quieter.
But I wanna make it faster so it creates more of a TKK on the front of the sound. So I’m gonna go right about here. And because our sustain is so low, we’ve lost a lot of our overall volume. So, bring it up. Alright, now we’ve got that spike at the front of the sound. Now I wanna make it a little angrier. I’m gonna use distortion. Lot of different distortion types here, I’m gonna go with clip. Crank our drive, and then I just wanna dial in a little bit, right? So there’s no distortion being applied, it’s fully dry right now.
It makes the noise a little bit more noticeable and it makes the saws a little angrier, a little more combative. And you can use other types of distortion. Not a huge difference in this case, but I like the clip, it’s got a bit more of a bite to it.
Next I wanna squeeze it with compression. Spire’s got this wonderful x-comp knob. It’s just a simple one-knob compressor. All this movement going on with the unison, all these voices, trying to compress that creates this really combative sound where everything is just kinda fighting and it just gets uncomfortably angry. Very nice.
You could do this with a regular compressor too, you’ll have to tweak the settings more, but the idea is that you’re forcing this moving sound to be compressed down, you’re squeezing it. Finally, this needs to be big and epic, we’re gonna use reverb for that. Gonna dial in a fair amount of wetness. I want it to be in a huge space, which a longer decay will give us. Oh yeah, we’re in a canyon, in a cavern.
Now, that’s nice, but that big, long, bright reverb kinda butts heads with the main sound. It just creates a lot of sound, it’s kinda messy. So I’m gonna dampen the reverb. It’s kinda like putting a low-pass on just the reverb. So we still get that big sound but there’s no more brightness in it so it’s not really filling up too much sound, it’s not really fighting the regular patch. And there you have it, big, supersaw trance lead.
Now, if there’s some patches you would like help with, any kinda patch, head on over to our forum at syntorial.com, and post a request there. And I or someone else will help you with it. There’s a link down in the description for that. And of course, we have a lot of videos like this on YouTube, so please subscribe.
You can check out how to make a simple sine sub at 00:19, a customizable saw sub at around 2:02 and layering at 3:10
Oh, and below are the recipes. Bon appétit!
Simple
Oscillator: Sine
Filter: If you want to bring in more mids to “hear” the pitch better, use a Lowpass filter and crank the Drive.
Distortion: Again, if you want to bring in more mids, add some distortion
Saw Sub
Oscillator: Saw
Filter: Lowpass, 24 dB. Bring the Cutoff way down, and then adjust it to your liking, depending on how much you want to be able to “hear” the pitch. Use Res to lighten it a bit and reduce some of the heaviest bottom end. And use Drive to make it warm and saturated.
Can’t wait to try these out? Come over to the Patch Share forum and show us what you came up with!
VIDEO TRANSCRIPTS
Sub-bass. Simply put, its just a really, round bass. And most commonly it’s just thought of as a sine wave so. That’s kind of your most basic and a fairly common sub-bass. Now to get rid of that little pop at the front, I’m gonna increase our amp attack.
And one really common example of using just a sub-bass all by itself like this is the 808 kick. 808 kick is a kick drum sound followed by this long tail, this long sub-bass tail so I’ll just increase our release and this is what we get. That’s what you hear on those 808 kicks. And so that’s what you’re going for, done. Easy, sine wave, then, you know, this is more about creating this really round low-end that Doesn’t have a real discernible pitch. It’s more just this bottom-end that you feel.
However, if you need to be able to hear the pitch a bit better, if you need to add some mids, so it’s just not this really low round sound. We’ve got a couple options. We can enable a filter, and if you’ve got drive, just crank the drive, bring our level down. You see the higher I turn it up. without, It’s nice, all right, so now we can kinda hear the pitch.
It’s still a big round sub-bass but now we can kinda hear what pitch is going on. I love this technique and it’s little bit of filter drive to it. If you don’t have filter drive, you can try distortion. Sounds different, but the same idea.
However, my favorite way to make a sub-bass, is actually with a saw. Let’s go over here, pop on a saw, filter it, and you can bring that cutoff way down, and pick exactly where you want it to be. You know, so, but want it really round, don’t want it kinda bright, and you can really dial in the exact sound and since we’re using the filter, we could bring in some drive. We can also use resonance If you wanna shape it a bit, take off a bit of the big fat bottom.
So saw through a filter is really the way to go if you really wanna customize your sub-bass to be exactly how you want it to be. Now, in this context, we’ve been using the sub-bass all by itself, but one really common use for sub-bass is to layer it in underneath another bass, particularly one that’s lacking a solid low-end. So for example…
This isn’t your ordinary synth tutorial. This is Syntorial. Making programming synths easy with videogame-like training, teaching you how to program synth patches by ear. Each lesson starts with a demonstration, then an interactive challenge with over 200 lessons. Once you complete the program, you’ll be able to create the sounds you hear using almost any synthesizer. Try the award-winning Syntorial today.
Let’s say I’ve made a, kind of typical classic bass. Something like this okay, that doesn’t sound bad, but let’s say I want a bunch of movement. Let’s say I want it real lush. I go with some unison, oh, that sounds nice, but you notice I really lost that stable, solid low-end. You know, unison moves it pulsates, and I want something that’s solid. Isn’t moving in my low-end.
Perfect opportunity to just layer in a simple sub-bass, hear that nice big bottom presence. It doesn’t change the character ’cause it’s just a sine wave. You know, there’s nothing in it. It’s pure, round, low end. And so what this means is you can, you know, take your main bass tone and do whatever you want to it. You know, the worry about the fact that it’s a bass like let’s throw on a phaser.
And as long as the sub is unaffected, which we can do, by enabling direct out this means it’s gonna skip the effects. It provides a nice, solid, low-end to go with our really active body of sound. Now, Serum is nice that it has this direct out option so we can have a sort of untouched sub-bass, other synths had this too but if you don’t have that, you can just use another synth, just open up a second synth and play the same line and the advantage to that is you can make your sub-bass however you want it to be.
You can go as simple as sine , but you can also do those other things we talked about, like running a saw through a filter, having two separate synths, that’ll really give you the ability to dial in the exact sub-bass you want.
All right, I hope you found that helpful. If you have any patch requests, go to our forum and post there and I or someone else will try to help you figure out that patch. And don’t forget to subscribe to our YouTube channel.
Since we’re so nice, we wrote down the synth recipes for your convenience:
Simple & modern:
Type of Synthesis: FM
Operator Routing: 2 -> 1
Operator 1
Waveform: Sine
Operator 2
Waveform: Sine
Pitch Ratio: 2:1
Amp Envelope: Sustain between 0 and 80%, quick Decay
Level: Between 80% and Max
Bit more complex, and classic
Type of Synthesis: FM
Operator Routing: 2&3 -> 1
Operator 1
Waveform: Sine
Operator 2 will give us our electric bass tone
Waveform: Sine
Pitch Ratio: 1:1
Amp Envelope: Max Sustain
Level: Between 60-80%
Operator 3 will give us our attack transient
Waveform: Sine
Pitch Ratio: 7:1 (adjust to taste)
Amp Envelope: Sustain at 0, quick Decay
Level: Between 70-80%
The Dexed download link is right here. No, not the word “here”, the orange ones. You missed them, go back. Yeah.
As per usual, the patch challenge is up and running so you can upload your version of an FM bass to the forum and discuss whatever you want with fellow Syntorians. Upload away!
VIDEO TRANSCRIPT
FM bass, this is a pretty basic FM synthesis patch. It’s a great way to learn how FM synthesis works. So you don’t have to have any prior knowledge of FM synthesis. I’m gonna show you how it works as we go.
This synth is dexed. It’s a free VST/AU for Mac and PC. Link to download is in the description below. So what do we have here? Well, we’ve got six separate oscillators, or as they call ’em in the FM world, operators. And they can only generate a sine wave. You can’t change the waveform like you can with subtractive and wavetable synths.
So how do we get interesting sounds when all we have is a sine wave to work with? Well, that’s where FM comes into play, frequency modulation. Operator 2 is routed so that it modulates operator 1. We can’t actually hear its audio. If I turn its level up, we won’t hear another sine wave. Instead, as we increase this level, it modulates operator 1 more, and ends up changing its tone. Listen. It makes it brighter, but it does it in a very unique FM way, in this kind of metallic, stringy way.
And we can change the nature of that brightness with operator 2’s pitch. By raising it, you’ll hear that tone become more metallic and higher up, listen. Now FM synths control pitch in a bit of a different way than what you’re probably used to with subtractive and wavetable synths. They use pitch ratios, which very briefly means they are multiplying the frequency of the pitch.
So F equals two means we’ve doubled the frequency, which equates to one octave. Three means we’ve tripled the frequency, which equates to an octave and a fifth, and it goes up and up through this thing called a harmonic series, which you can look up. There’s plenty of information on that. I’m not gonna talk about it, ’cause you don’t need to know it. All you need to know is that this Coarse knob, as you raise it, it changes the nature of that brightness, makes it more metallic, makes it higher.
I’m gonna keep it at one right now. So it’s the same pitch as operator 1. Where things get interesting is when we modulate the level of this operator. So this level is its volume. As we increase its volume, it modulates operator 1 more. Therefore, all we need is an amp envelope to modulate this level, and that’s what this is right here!
So I’m gonna take the sustain level, right here, turn it all the way down, and I’m gonna take its decay rate, which is right below, and right now, it’s so fast that it just jumps down. That’s why there’s nothing here. I’m gonna slow it down. And what do we get? Right, so it’s taking this level and it’s shooting it down. It’s creating our basic starting FM bass.
Now, if you’re listening closely, you kinda hear some noise in there, this crackling sound. That’s just something this synth is doing. I don’t think other FM synths do that so much. It might just be a small shortcoming of this synth, but hey, it’s free. And you can kinda reduce it a little bit, by bringing our low pass cutoff down. Just takes some of the highs off. It’s still kinda there, but… Okay, so that’s a basic FM bass, right there!
Now it modulates all the way down to zero, leaving us with a sine wave. Here we have a sine wave, but maybe you don’t want that. What if you want there to be a little bit more in your sound after that attack transient? Well, you could raise that sustain level back up. Oh, yeah, maybe right there. Eh, maybe there. You get to decide exactly where it ends.
And watch what happens when I raise this pitch up one octave. That might sound more familiar. This is a very sort of modern approach to FM bass. It’s nice that it’s simple. Maybe I don’t want it to be as bright. There we go. All right! So that’s our first FM bass. Kind of modern-sounding, real basic approach. I wanna show you one more approach, more complex approach, that’s gonna get us more of like a classic ’80s-style FM bass.
This isn’t your ordinary synth tutorial. This is Syntorial, making programming synths easy, with video-game-like training, teaching you how to program synth patches by ear. Each lesson starts with a demonstration, then an interactive challenge, with over 200 lessons! Once you complete the program, you’ll be able to create the sounds you hear using almost any synthesizer. Try the award-winning Syntorial today.
I’m gonna remove this modulation here. Go back down to same pitch as operator 1. And I’m just gonna use this to get our timbre. I wanna get kind of like an electric bass, like an actual string electric bass tone. Yeah, maybe there. And if you wanna get rid of those pops and clicks, put a little bit of an attack on operator 1. That’s not bad, how ’bout, and then the release as well, we wanna have a little bit of a release.
Okay, now, I want to take operator 3 and modulate operator 1 with it as well, use that to create our attack transient. ‘Cause I’m missing that at the beginning, all right? It’s just kind of a muted sound. Now you could stick with this if you just wanted this simple, plain electric bass tone; it’s perfect. But I want some attack transient on there, and I’m kinda going for that more classic-sounding FM bass.
The problem is, by default right now, operator 2 is modulating operator 1, but 3 is not operating modulator 1. That’s where we come down here to the routing of an FM synth. So the way they do it in dexed is, the operator numbers that are on the bottom row are the ones we can actually hear. So we can hear 1, we can also hear 3. And then, up from top, we have a sort of cascading modulation, so 2 modulates 1, 6 modulates 5, modulates 4, modulates 3. We don’t need all that. I need 2 and 3 to both be modulating operator 1. So I’m gonna change the algorithm. There’s a lot of ’em.
The one I found was right around here. 2, 3, and 5 are all modulating operator 1. I don’t need 5, but I got what I want out of this, 2 and 3. Okay, so right now, we still just have 2 modulating operator 1. I’m gonna increase 3, and use the amp envelope to create an attack transient, just like we did before. Let’s go up to two. It doesn’t quite sound like it did when we were using this operator, right? Because now we have two operators modulating operator 1, so it’s gonna change the nature. They’re gonna interact in an interesting way.
I’m gonna go up to seven now. Now what do we got? Let’s go a little faster. Back off on this a little bit, there we go. And maybe ease off here. There it is! A little bit more of a classic-sounding FM bass. And of course, I could try other pitches.
So there you have it, and as you can see, there’s a million ways you can create an FM bass with an FM synth, all with varying tones! Let me show you one example that came with the presets, FM bass. This uses all six operators. Different routing here, so we’re actually hearing 1 and 3, they’re sort of layering two sounds together and using the other operators to create the tones for each of those.
All right, so there is a Patch Challenge over on our forum, syntorial.com/forum. Go there, and I wanna hear your take on FM bass. Download dexed or use whatever synth you have, and then post your patch there and talk about it a little bit. I wanna hear what you can do. And while you’re at that forum you can also create new topics and request other patches. So if there’s a particular patch from a song you wanna know how to make, post there, and I or someone else will help you make that patch. And of course, subscribe to our YouTube channel to get more videos like this.
Buckle up, newcomers! This video is a short and sweet introduction to the wonderful world of plugins. What they are, how they work, and most importantly, what you can do with them. Intrigued? click the video, but only if you’re buckled up… I did warn you.
VIDEO TRANSCRIPT
Plugins. What are they? If you are new to making music in a computer, you have definitely come across the term plugin. I’m gonna tell you what they are, how they work, why you should care. So first let’s start with this synth application. This is a regular, standalone app, this is not a plugin. It’s Syntorial. You download it, you install it, you open it, and here’s your synth.
Now the only problem with a standalone synth like this is you can’t record it into your recording app, right? Like you’re using Ableton or Logic or one of the many applications out there, also known as DAWs, that you use to make music. And I wanna use this synth, along with other sounds, but I can’t here in this synth application.
That’s what plugins are for. A plugin is just like an application except it’s designed to be opened inside of a recording app, so you can use it to make music alongside other plugins.
So, let’s hop over to Logic. So I have installed the plugin version of Syntorial synth, it’s called Primer. And I did it the same way, I just downloaded it, and I installed it, that’s how you install all plugins. However, once it’s installed, you won’t see it in your applications or program files folder, you can’t just open it directly, it’s only designed to be opened and used inside a recording app.
And each recording app does it a bit differently as far as the layout is concerned, but for example, here in Logic, my default track is electric piano. But I wanna open Primer in here. So in their case, go into this menu. Go to AU Instruments, I’ll explain what AU means. And Audible Genius is the name of our company. And there’s Primer. And now, it’s the same synth from the standalone version, the same controls, same exact sound, but now it’s inside Logic, so I can record it into Logic and play it back. And there you go, and I can make another track, and I can open up a different plugin and I can do drums, and bass, and whatever I want. That’s why plugins are such a huge part of computer music, is they are the sounds, they are the instruments.
As you can see, I’ve got a lot going on here. So whenever you install one, it just gets added to your DAW’s list. Now, this is a synth. There of course are also samplers like for drums or real instruments like piano. And then you can also use effects. So let’s say I wanna add some reverb, but I don’t wanna use Primer’s built-in reverb.
Well I can grab a reverb plugin, let’s grab this first one. So now, my Primer plugin is being routed through this Chroma Reverb. So you can see, you have an endless variety here. There’s so many plugins and you can just kinda chain them all together and create whatever sounds you want. Now, you’ve probably come across different plugin formats, like VST, AU, and maybe even AAX.
This isn’t your ordinary synth tutorial. This is Syntorial. Making programming synths easy with video game-like training. Teaching you how to program synth patches by ear. Each lesson starts with a demonstration, then an interactive challenge, with over 200 lessons. Once you complete the program, you’ll be able to create the sounds you hear, using almost any synthesizer. Try the award-winning Syntorial today.
Now, you’ve probably come across different plugin formats, like VST, AU, and maybe even AAX. These are simply just file types. The Primer, for example, comes as a VST and AU. The synth itself is identical. You won’t get a different sound, different controls. It’s all exactly the same. Where this matters is with your host, whether it’s Logic, Ableton, FL Studio, whatever your recording app is, you need to check what file types it allows.
So, for example, VST is the most common. Almost all recording apps allow you to use VST plugins inside of them. So much so that the term VST is often used instead of the term plugin. What VST do you have, how many VSTs do you have, oh I got a new VST. It’s actually a specific format but it’s such a major and popular format that it’s kind of ubiquitous. However, Logic, for example, does not allow VST. It only allows AU. And there’s another DAW called Pro Tools, it only allows AAX. So as far as you’re concerned, look at whatever host you’re using, find out what formats it allows, and just get your plugin in that format.
Now each developer decides what formats they wanna create. We decided for VST, AU, some might only do VST, you know. So you may not have access to the exact plugin you want, but, once you know the format your host accepts, look for that format. And by the way, there’s VST and now there’s VST3, which is the latest version of VST. But again, as far as you’re concerned, just check your host. If it supports VST3, get the VST3. If it supports VST, get the regular VST.
So this is Mac. Windows works the same. Download, install, open your DAW, there’s your plugin. However, IOS is a bit of a different story. Now in IOS, there’s only one format, AUV3. And instead of being called a plugin, they’re often referred to as extensions because they’re actually extensions of the regular standalone app. So at the top left corner you see Primer. And we downloaded that from the app store, just as you would any other app. And if I click that and open it directly, it’s basically just a standalone synth.
Now if I wanna record it, I’ve gotta go into a recording app. Let’s go into GarageBand. Now GarageBand, like other apps, give you different types of instruments you can add. And a lot of them have an AUV3 extension, so we see at the bottom left here, audio unit extension. Tap that, and now you see Primer. Because any app that has an extension version automatically installs the extension when you install the app, so you don’t have to go searching for an AUV3 extension.
You just have to find apps that have extensions built into them. Once you install the app, here it is, and I just tap Primer. I can play and record Primer inside GarageBand. Okay, well I hope that was helpful in understanding the whole plugin system. And if you have any questions, post them below in the comments and I’ll happily answer. And don’t forget to subscribe to our YouTube channel. We post videos every week about synthesizers and sound design.
We’ve all heard realistic orchestral sounds… those are made with samplers and that’s no fun. How about designing string-like sounds with your bare hands?
In this video, I’ll show you how to get that string character out of your synth. Much easier than learning cello.
When you’re done watching the video, head on over to our forum and upload your patches for discussion.
VIDEO TRANSCRIPT
Synth Strings. I’m gonna show you the different things we can do to a patch to make it more string-like. Now if you are looking for real accurate string sounds from a plugin, what you need as a sampler. If you want to be really, really, really real, sampler. They sound amazing, especially the ones they make nowadays. But this is more about getting that string character out of your synth, getting something close to it or even just incorporate it into a patch.
So we’re gonna go over all the different techniques that give us and patch a string-like character. So here we are, we’ve got a saw wave and that’s it. First things first, we need some voices so we can create a chord. Gonna go for that sort of orchestral string sound.
Now, right now, a waveform by itself, very static, unmoving but strings a bunch of violins and stuff like that playing at the same time, they all have a similar sound playing the same note, yet they’re not exactly the same. So they have this sort of smearing pulsating sound. We can get that with unison. We create four copies essentially of our saw wave then now they start to wave against each other.
However, we don’t want their phases to start at the same time. That gives us a very abrupt attack transient. And this is way too fast at the detuning. We need it to slow down. Much more string-like. And this is an orchestra so we want to spread out. Next, amp envelope. We’re gonna make two small changes here, they make a big difference.
First off, our sound is immediately starting. It’s just like very sudden it’s synth perfect, but we’re making a more realistic string sound and bowed strings tend to kind of ease in. So we’re gonna increase our attack. Same goes for the release. We don’t want an immediate let go. We want a tiny bit of a tail. All right, amp envelope.
Next filter, we’ve got a really bright, bright sound. Strings are bright but they’re not this bright. We want to take some of that sizzle off the top. That sounds nice. However, listen to notes in the lower range. They’re too bright, they’re starting to sound like a synth again. Not really strings anymore. So if we want a lower cutoff in the lower range, higher cutoff in the higher range, key tracking. Turn this up and now adjust this a little bit. Go back up to our mid range.
Key tracking is great when you know you have a patch that’s across a wide range and you wanted more of a consistent, even cutoff across that range. You just turn up your key tracking, adjust it until you get what you want. And you’re gonna have to adjust the cutoff as you go along too.
Okay next, our orchestra is gonna be in a hall, so let’s give us some reverb. All right, so this is a nice basic, very synthy analog kind of string. But this is legato held notes. What if you want short notes? Well, let’s take our sustain down and our decay. Great, wanna increase your volume when you do that. Good, now what if we want it to hold so we get this sort of a staccato attack but the notes hold.
Excellent, and if we want a pluck, bring that back down and then bring our attack down. That starts to sound pretty synthy. That’s better. It’s still pretty synthy but that gives you your pluck. Once we lose that sort of bowed character, we also start to kind of lose the string character. So put that back in, bring this back up. Okay, how can we make this a little bit more realistic?
(ad) This isn’t your ordinary synth tutorial. This is Syntorial, making programming synths easy with video game-like training, teaching you how to program synth patches by ear. Each lesson starts with a demonstration, then an interactive challenge with over 200 lessons. Once you complete the program, you’ll be able to create the sounds you hear using almost any synthesizer. Try the award-winning Syntorial today. (ad)
How can we make this a little bit more realistic? Well, the first thing we can do is start messing with our waveform a bit. So this is just a saw but I’m gonna switch over to oscillator two and we’re gonna to do a pulse wave. It’s a bit more of a stringy character but I wanna take it one step further. I wanna morph this waveform. We could do that with pulse width modulation, which essentially let me turn it off, this will go like this. It’ll morph it.
So again, we get that realistic changing of sound. We can do it automatically with an LFO. You can hear it there, it’s too obvious. Okay, that’s very stringy. It’s kinda more of a stringy character but it still sounds kind of artificial. That’s kind of one of the downsides of a pulse wave. So I like to mix the two together. I like a little bit more saw than pulse. Listen to our saw without the pulse. With the pulse. Also with our pulse on, we can bring our cutoff down a bit.
Also to add yet another bit of movement now that we have two waveforms, two oscillators, we can just detune them away from each other a little bit. All right, so we took a step closer by morphing, our waveform and mixing in a couple of different waveforms. But if I wanna take it even closer, what I’m gonna do is hop over to a wavetable synth, and we’re gonna use Serum.
You can really use any wavetable synth. Right now, this is set up just like our basic Primer saw classic analog string synth. Okay, before we get into wavetables, one realistic step you can take is a filter with a more shallow slope. So Primer had a 24 DB slope, which is pretty steep. That’s what we have set up here but if I make it a little more shallow, let’s go to 18. Adjust my cutoff.
It can be little bit more realistic ’cause in real life, these sort of sharp, steep filter slopes aren’t as common. So a bit more of a shallow thing kind of just helps give us a more realistic, bright shape.
Okay, now let’s talk about wavetables. So we’ve got our saw here. We wanna mix in a different waveform just like we did with Serum or with Primer. So I’m gonna copy oscillator A to B, I am going to pitch them away from each other, like we did with Primer but this one for this waveform, I wanna find a very stringy wavetable and if you have a synth that’s got an actual string wavetable, great. You’re gonna get really close to being a little bit more realistic sound.
This one for me, I was able to find one called bowed metal. Now by itself, this sounds like this. Definitely got the right vibe. I wanna find a more realistic spot though. And when you’re looking for this spot, you should do it with it mixed in because something by itself sounds a little different than it does when it’s mixed in. I like right about there. But more importantly just like with Primer, we wanna modulate this. So we’re gonna take our LFO, right on here.
Just a subtle modulation and slow modulation. All right, so this is a bit realer than that pulse width, ’cause this is actually probably taken, it’s a tiny little portion of an actual recording of some metal being bowed. So it’s an actual sort of bowed sound that we’re now sort of layering in. More realistic. So that’s our bowed sound. What about staccato? There’s some things that we can do to make staccato a little bit more realistic and that is, first, we wanna obviously shorten it.
If you can curve your decay stage up, a little bit too much. Turn your cutoff down a little bit more. Here we go. We got this staccato sound. Now when you attack a string, two things happen and an initial attack, it’s a tiny bit brighter than the rest of the sound, but also there’s almost this kind of like the bow rubbing against the string kind of creates this almost noise this SHH right at the beginning. So we’re gonna layer in some white noise, just as an attack though.
So right now, it’s… We want it to be shorter than the sound. Just the very, very beginning of the sound. So I’m gonna take this envelope we’re gonna make it really, really short. And we bring a little bit… And we’ll straighten the curve up a bit. And then we also wanna route this same envelope to our filter, just a really small amount. Compared to without. And there it is.
So again, if you need something that’s very, very real, go for a sampler. This is more about how do we bring a string character into our patch. So if you’re looking to do that, you can try any of these techniques and they’ll help get you there.
In this video, I’ll take you through the process of creating an evolving pad from scratch using Serum.
We’ll learn how to design the ebb and flow of a long, lush, moving pad. We’ll also answer the question “How many adjectives are too many adjectives in a blog post?”
If you have an evolving pad and would like to share it, visit our Forum. We’ll stop talking about adjectives, I promise.
VIDEO TRANSCRIPT
An evolving pad.
This is a pad that changes in different ways continually over a long period of time so here’s one I cooked up.
All right, so the key to a pad like this is two things: layers and tons of modulation.So I wanna to recreate this from scratch. Bring the original over here. Look at it… all right and now, we’ve got just a good ol’ plain saw wave so, first thing I’m going to do is just give ourselves a long release.
For the amp envelope, simple here just so when I let go of the key it rings out. Then I want to just smear the sound a little bit, so I’m going to give it some unison. Great. Then I’m gonna filter it and this will be our first sort of slow, evolving sound. By modulating it with a LFO. So, let’s enable it and I messed around for a little while and I just ended up liking how the 18 dB slope felt.
All right, let me take LFO 1,modulate the cutoff and I don’t need a ton here just a little bit up and down. And that’s way too fast. I’m gonna set it so it’s not syncing to the tempo make it really slow. There we go! Okay, so that’s our first point of evolution, right? It’s a very slow change in our cutoff And I also made this change so that it always starts at the top. You don’t have to do this, this is just a preference for me.
I just kind of like to how I’m always getting this nice bright attack on the sound and I really want to accentuate this cutoff movement,so I’m gonna increase the resonance. All right, so there’s our filter movement.
Now, let’s add another layer of movement and we want to be in a sort of a different pace so that it sort of kind of interacts with the filter movement in unpredictable ways, so I’m gonna take our oscillator over here and let’s switch to a wavetable again I was just experimenting and I like the way this one sounded.
Right around here.Now this doesn’t sound terribly different from a saw. However,I am going to modulate it with an envelope. I’m just gonna route envelope two here I messed around with the ranges and I liked this range. And we are gonna go with…I’m gonna lock this envelope so I can see all the stages a really really slow attack. So much, about nine seconds to get up and then instead of sustain down here and again our decay will be nice and long. We’ll also do nine seconds.
Now what do we have? So you see, by the time it takes this envelope to get all the way up and down for this wavetable to change all the way and then come back, the LFO for the filter kind of goes through this little less than two times, right? So you get these sort of conflicting cycles. Modulate two different things so it creates multi-as I hold this down it’s just going to change even after the wavetable is right here starts coming back, cutoff starts over.
So at this point the cutoff is moving up and down while the wavetable moves up and down.But when the wavetable is done moving so now we hear the cut off moving up and down without the wavetable movementSo we just created a very long complex layer of change.At first we’re hearing cutoff movement and wavetable movementand then we’re hearing just cutoff movement Right? so that’s two large stages of change. Right off the bat we have this long changing evolution. Okay.Let’s bring in another layer-
This isn’t your ordinary synth tutorial, this is Syntorial. Making programming synths easy with video game-like training teaching you how to program synth patches by ear. Each lesson starts with a demonstration then, an interactive challenge with over 200 lessons. Once you complete the program you’ll be able to create the sounds you hear using almost any synthesizer. Try the award-winning Syntorial today.
Let’s bring in another layer using our noise source and in serum it’s more than just noise. I like this atmosphere 7, track the pitch, see the settings. Now again, I don’t want this just to come in and stay there, I want to you know bring this in and take it out, do something with modulation so,I’m gonna route our envelope to our level.
Start the level at zero so then now,if I give it a fairly long attack let’s say this is going to be about almost six seconds now that means we’ve got noise taking six seconds to come in versus our wavetable taking nine seconds to get all the way to the end. So now our noise is going to come in kind of partway through this wavetable modulation and then the wavetable modulation will continue. There’s the noise.
Now, I don’t want the noise to just stay there. Right? I want it to kind of start to go away but never fully away cause later on, it’s always still kind of there creating a little layer of complexity. So I’m gonna take our sustain and bring it down to about 64 percent and our decay to about 8 seconds. So now, here comes the noise now it’s gonna kind of start to drift away and there it is. it’s gonna sit there, so it’s present but it’s not in your face. Okay.
Let’s add yet another layer with oscillator B and for this one I want to make a really distinct sound that’s sticking out, bring ’em down a bit, filter ’em. I’m gonna bring them up two octaves. We’re gonna go heavy on the Unison: six voices I’m gonna leave it strongly detuned. Okay now that’s kind of abrasive, it’s really on there really visible or audible so let’s modulate it.
We’re gonna take an LFO and I want to do something a little different here. I’m gonna go square and I’m gonna route this to our level and let’s hear what it sounds like right now. Make it faster. Okay now, actually I like that,but I want it to swell in, right? Again kind of like with the other things, I don’t want this to just be there right away I want to gradually come in so we’re gonna use this LFO’s rise method and that basically- it does a fade-in of the LFO itself and so what we’re gonna do is set the level of oscillator B there. Max there. Now:
And if I increase the rise, you’d think okay it’s gonna start quiet, and then it’s gonna get loud but it didn’t. This confused me at first. You see, it’s actually starting up here at the top Why is it doing that? well because Rise pays attention to where this LFO waveform starts and it starts at the top so that means it’s gonna start up here and it’s gonna rise like that.
Alright it’s gonna stick up here then it’s gonna gradually increase the range until it’s using the whole thing. So what we want to do isthere’s a few things you can do here but I like this solution. what I particularly like about this is it almost sounds like the LFO has several fade ins. Right? You have the initial fade in from the LFO and you get another fade in as the cutoff comes back up again. Rising in and then the cutoff is increasing and then it’s collapsing, increasing again but without the wavetable, so it makes this one more audible.
All right so there’s almost three different stages of this oscillator B thanks to the cutoff in the wavetable movements and the rise of the LFO. Alright, let’s do one more thing. Let’s throw some chorus on there to kind of glue things together a little bit. Nice. And then let’s do a reverb and I want this to be pretty heavy. I want to do one other interesting thing here: I want to modulate the reverb mix.I love doing this. It really kind of -it’s an odd sort of thing that it does to the perspective.
We take say, LFO 2, make it bi-directional and again we’re not gonna sync ourselves we’re gonna go pretty fast. Listen to what it does I love that. It’s like this dimensional pan that, you know, it’s just kind of otherworldly. I really love the sound of that but again, I don’t want this on the whole time but kinda want this to fade in and fade out. And I might use rise, right?but that would only fade it in and then keep it in I want to fade in and then fade out.
This is where we can use our auxiliary source. So essentially here’s our modulation for our LFO2 to reverb wet. I can set auxiliary source to envelope 2 Now remember, envelope 2 is gradual over nine seconds. This is what’s modulating our wavetable. So now, that reverb modulation of the mix will fade in with this envelope and then fade back out. Listen. Here it comes
That’s an evolving pad! Again, I’m not telling you what to do here,I’m just giving you examples. What you want to focus on are layers and modulation.
Ah, the elusive Filter Slope: the bigfoot of synthesis. Some people have seen it, most don’t quite understand it but no one can deny its existence.
Here, I explain how it works and how to use it (by this point, the bigfoot analogy is over).
OR IS IT?
VIDEO TRANSCRIPT
Filter Slope. I think that’s something that a lot of synth users, don’t really understand. And even when we do understand it, we’re not sure how to use it, what it’s for. So I’m gonna tell you what it is, but more importantly, I’m gonna show you a patch that really makes it obvious. And also one, because it’s so obvious, it means it’s really important that you pick the right slope.
So first things first, what is slope? Let’s take a look at our filter over here. I’m going to turn our resonance down for a second. So as you know, a low pass filter like this, allows you to cut highs off your sound. So when I have my cutoff all the way up, it does nothing. full brightness. And then as I turned it down, Starts to cut highs off for our sound making our sound rounder. Our cutoff is right about here.
Now, a lot of people assume that, you know, whatever your cutoff is, everything above that is just chop right off. But in actuality, it’s more of a gradual cutoff, as you can see here So our cutoff is here and then it just kind of starts to gradually remove some highs. Our slope determines how steep that is. So this is a 12 DB low pass, by increase it to 18, it got steeper. Watch this line increase. Increase it to 24. So as you might guess, the steeper the slope, the rounder the sound gets, right?
Cause we’re cutting off more highs, a steeper slope is removing more highs. So you might think, and I think a lot of people think, well, why not just, you know, if you want it to remove more highs, rather than change the slope, why don’t you just turn the cutoff down. And you’re partially right However, in some cases it really matters. It matters that you change the highs using the slope instead of the cutoff. And this patch right here is a great example.
This isn’t your ordinary synth tutorial. This is Syntorial. Making programming synths easy, with videogame-like training, teaching you how to program synth patches by ear. Each lesson starts with a demonstration. Then an interactive challenge, with over 200 lessons. Once you complete the program, you’ll be able to create the sounds you hear using almost any synthesizer. Try the award-winning Syntorial today.
So with this patch. See it’s an envelope, modulating our filter’s cutoff, just make an “EEUNG” sound with a ton of resonance, really showing that cutoff. And this is what I had made. This was a patch request on our forum. And someone had put up a patch that sounded like this. And mine sounded like this. It’s really close, but the big difference is, as you notice the hidden patch, it’s brighter.
Its all the sizzle up top. Mine is. so I’m thinking, well, if the hidden one is brighter, mine’s darker, I should just increase my filter envelope amount right? So that it starts higher. I get some more brights in there. So, that’s what I tried. I tried increasing this. So I get, you know, start my filter from a brighter point. Okay. So it was brighter.
Let’s compare that. Now, I achieved the brightness, but it’s different. And more importantly, that EEUNG sound? Right? That envelope, movement, cutoff, resonance, that shape that it’s generating, it’s different now, mine starting higher than the hidden one. Its got more of that at the top, whereas theirs is more of So it loses that really important character. So I knew that wasn’t correct.
And I brought that back down. Yet still, I had this problem. The other patch is a brighter. So how can I make this brighter, without messing with my cutoff? And that’s when it hit me, slope. I can lower my slope to make it a more shallow drop here. And that won’t change my cutoff resonance at all. It’ll just add highs onto it. So let’s see. Let’s try going under 18. That’s better 12. There it is. Let’s hear the hidden one. There it is.
So you see that shape. That really Important cutoff resonance envelope shape, stays exactly the same, no matter what my slope is. But my slope lets me add or remove brightness on top of it. Too bright. All right, well I hope that helps kind of make clear what filter slope does and why you would want to use it.
Have you ever thought to yourself “Man, it would be awesome if I had an 8-minute video that shows me how to synthesize a kick, snare and hi-hat beat from scratch”?
Well today’s your lucky day! Also, that’s a very specific thought you had. Weirdo.
If you are overcome with an urge to create and share your new drum track, join us in the land of forum posts.
VIDEO TRANSCRIPT
Drums. So we got a kick snare and a hi-hat all synthesized in this case using Primer. But you can really use any pretty much any synth.
We’re gonna start with our kick drum. Sounds like this. Now, I’m gonna reset this so we can design it from scratch. So here’s what it sounds like just as a plain saw. So it’s a really, really low pitch C negative one. In fact, it’s the pitch I’m playing. We’re gonna switch over to a sine wave.
Now you not gonna to really be able to hear it at all. Barely hear it. To get that kick sound, what we’re doing is we’re just starting our pitch up really high and dropping it really fast with a mod envelope or in this case, a pitch envelope. So I’m gonna crank it. And with a really long decay, here’s what we get.
I’m playing kinda short note so, Here is what sounds like if I hold the key down. Now, when we do that really quickly, I’m gonna set to about four or five milliseconds, that drop in pitch starts to sound percussive. For whatever reason, that quickly dropping pitch gives a percussive sound. This is essentially our basic kick.
Now I’m gonna add a little distortion to it. Kinda beef it up a bit. Now, if I hold the key down. You get that note at the end. We don’t want that. So we gonna take envelope and make it real short. Just like that, we can match it with the release. Now, we had that little ‘T’ at the front of our sound, we can get rid of that if we don’t want it by increasing our attack a little bit. But you might want that.
Now I use the sine wave, but you could use other wave forms, if you want a bit more of open, brighter sound like here’s a pulse sounds like we gonna filter it. Almost kind of flabby but it’s just a different tone. Saw, try triangle But sine will give you the cleanest. So that’s our kick drum.
Now let’s move on to our hi hat. This is a combination of white noise and a really, really high, medium pulse wave. So I’m gonna reset this. Here’s what we have. So I’m playing a really high note C7. And, we’re going to start by switching to a medium pulse wave. Not a huge difference, but it’s a little bit more So a little bit more of a metallic vibe. So what we’re getting from this oscillator is the kind of just like the metallic tone you get when you hit an actual hi hat because they’re made out of metal.
Next, we need to shorten big time. So that gives us a little bit of that metallic attack and then we can high pass it. We’re taking as much of that bottom off as we can. We’re just up at this very tiny top. And then we crank our noise. I turn off the oscillator. There’s just the noise. So you see how they combine to create this sort of metallic tone and the actual shh-shh we get that we really want in the hi hat.
Now I kinda like to dial this down a bit so that the metallic little pitch isn’t as noticeable. To do that in Primer, I’m gonna turn off oscillator two and start to turn the mix away from oscillator one. So it’s all white noise. It’s up to you. How much of that metallic do you want in there? I like to be pretty subtle.
One more detail I want to mention about the hi hats is the volume. Right now it’s very stiff. Every hi hat is the same volume. But it’s more common to have the volume changing so that some of the notes are louder than others. This creates some bounce in our feel.
We could do this by routing our velocity to volume. We’re gonna do max amount. And now when I recorded this hi hat, I hit some of the notes harder than others. So here’s what it sounds like. There’s a bit more bounce to it. Compared to when there’s no All loud now. It’s subtle, but you can really feel it. And that’s an important aspect of the hi hat.
Now, snare. Snare actually consists of two different sounds. You have the drum kind of like a kick, and then you have the wash. You combine those two to create our snares. Let’s start with the drum. For this all by itself, sounds like this. And to do this, I literally just took our kick drum, which is this And just played it at a higher pitch.
So if the kick I was playing at C negative one, now I’m playing the same exact preset at C zero. And then dial the decay down a little bit to make it shorter. Yeah. That’s the drum part of our snare. Almost identical to the kick. Now I’m gonna bring in the wash.
The snare and this It’s just white noise that’s been band passed. So if I reset this first I’m gonna turn off our saw turn up our white noise to about here. And then we want to shape it. Maybe a little longer And then… And I like a little distortion in this too just make it more aggressive. Now I bring the drum back in There they are together. Here’s just the drum. Now, the wash. Now, the whole kick. Drums!
Look at me! I’m posting about #PatchFriday on the blog!
This week is all about Frequency Modulation and the giddy fun that comes with making a synth growl. It’s funny cause Synths don’t growl! You’re thinking of lions, common mistake.
Feel free to talk amongst yourselves in the comment section below.
VIDEO TRANSCRIPT
Operator growl. There’s a million ways you can do this. They all sound different because of the different wave forms used, different distortions used, you know, whatever. There’s a lot of ways to do this so here’s just one way. I’m gonna deconstruct this, turn everything off.
Started with a square wave. We want something nice a bright like that, and I adjusted the level all the way up to zero and turned the main volume down. I like having this a zero; it helps me, you know, understand how these are interacting a little bit better ’cause it’s all about the volumes of the different operators.
And I pitched it up to two ’cause that’ll allow us to put an operator one octave below and then yet another operator one octave below that. Why? Well, ’cause that’s where our growl comes from. So if I bring in this second operator, I set it to saw 64, I liked how those two interacted.
Again, you can experiment with the waveforms you want. This is down one octave below that. We start to get some growl. Let’s listen to it. Now, we’re gonna do it again with this third operator down yet another octave. This one’s square. Now we’re really growling. So, that’s our base sound.
Now we wanna shape it and do things to it. Filter. So, this is giving us that wow, right? We set a really low cutoff and our envelope has a pretty quick attack, the wah part and then a slow decay, a wow, just like that. Envelope ’em out here; I set it to almost halfway. However, one reason I like this OSR is because it gives us filter drive. Without that, all right, still growls, but that really pushes it, saturates it, it sounds nice. We’re looking to get aggression from wherever we can.
So, we got some growl from here, we got some saturation distortion from the filter drive. Now, let’s add our pitch movement. This is simple enough; you can go with a falling pitch or rising pitch. I went with a falling pitch and took this up to about 46% and then I just elongated the decay, so we just kinda get a Okay, so there’s a basic sound, but it’s not nasty enough, so we bring in vinyl distortion.
I like this because it allows you to kinda put in the frequency spectrum where you want that distortion. I like it right there. I mean, you can do it anywhere. I like it there, and I widened it as well. It was like this. The drive is cranked all the way up, and you gotta keep in mind that their volume here really matters; the higher the level going into this, the more distortion you’re gonna get, so, you don’t want too little or too much.
Back it off, if you really wanna make it nasty, but I like it right around here. And then, ambience, and I just use their preset called ambience for this, adjusted the dry/wet.
We've detected you might be speaking a different language. Do you want to change to: